

What does it really take to hike Tour du Mont Blanc? What are the trails like, what equipment is indispensable, and what should you know in advance? Here we answer all the questions we ourselves had before our hike.
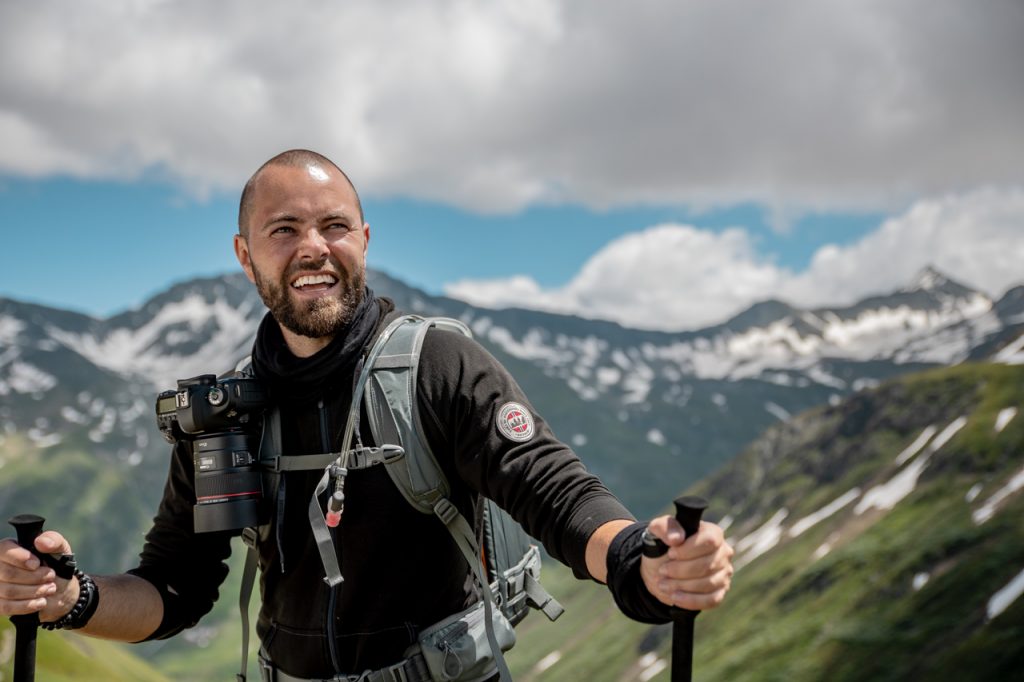
Written by Mette / Photo by Martin
Translated from Danish
The guide has been published in a Danish outdoor magazine
Tour du Mont Blanc is among Europe’s most iconic hiking routes for a good reason. But is it even realistic to hike all the way around Western Europe’s highest mountain when you are new to hiking in the mountains, have never tried hiking for several days in a row, and at the same time have a hint of a fear of heights?
That’s roughly how some of our questions sounded before we set off ourselves. Motivated by the dream of hiking Tour du Mont Blanc, in the summer of 2018 we took up the challenge and set off. The project succeeded. Over seven days we hiked around the mountain and completed our toughest but also most unforgettable hiking holiday to date.
Along the way, we learned a lot about the route, the paths, and what it takes to hike in the mountains. We learned about equipment, clothing, sleeping facilities, meals, and daily routines. We have collected the gained experience here and hope that we can help others who are either considering or preparing for a hike in the Alps.
13 ESSENTIAL THINGS TO KNOW
ABOUT THE TMB-ROUTE
Tour du Mont Blanc (TMB) is an alpine route that challenges your physical state but does not require a guide, advanced equipment, or a great deal of experience. The route goes in an elongated circle around Western Europe’s highest mountain, Mont Blanc, and extends in its entirety approx. 170 km.
#1 – The peak
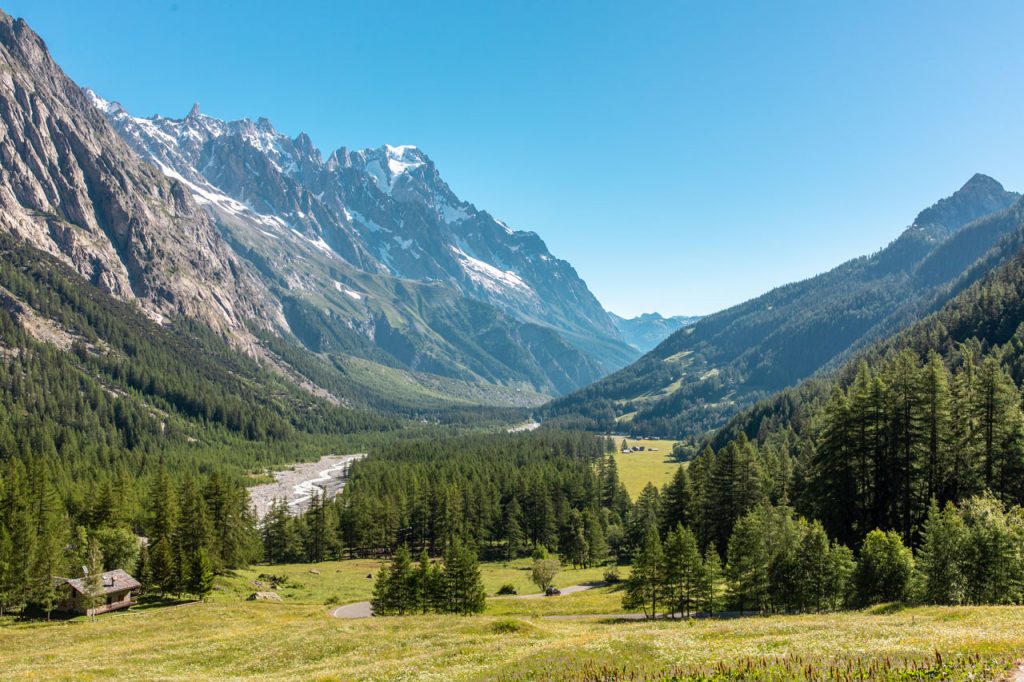
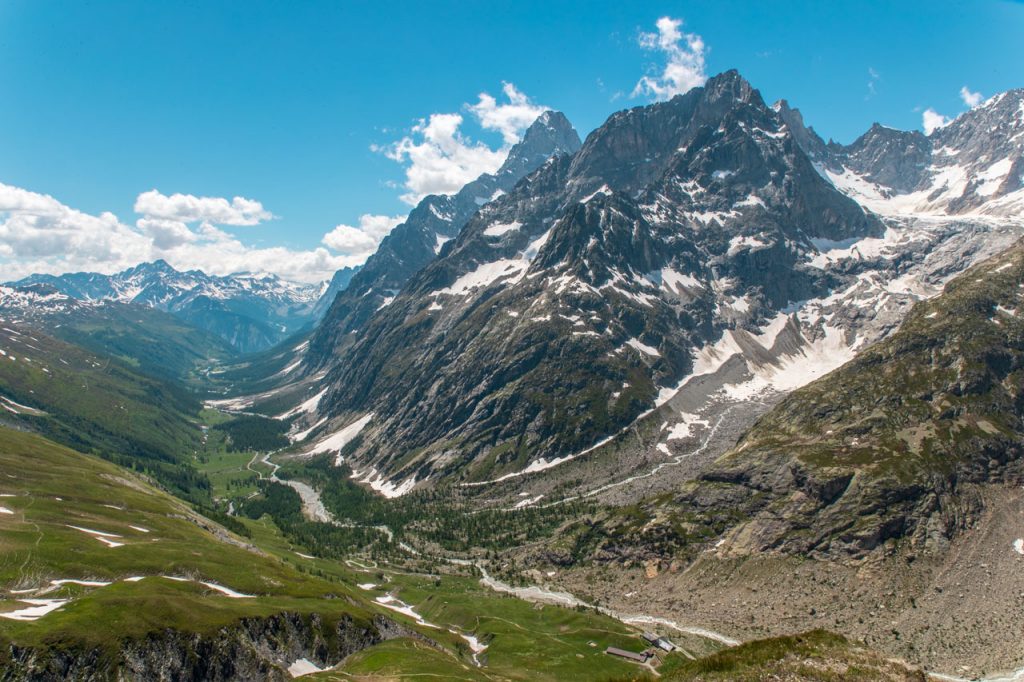
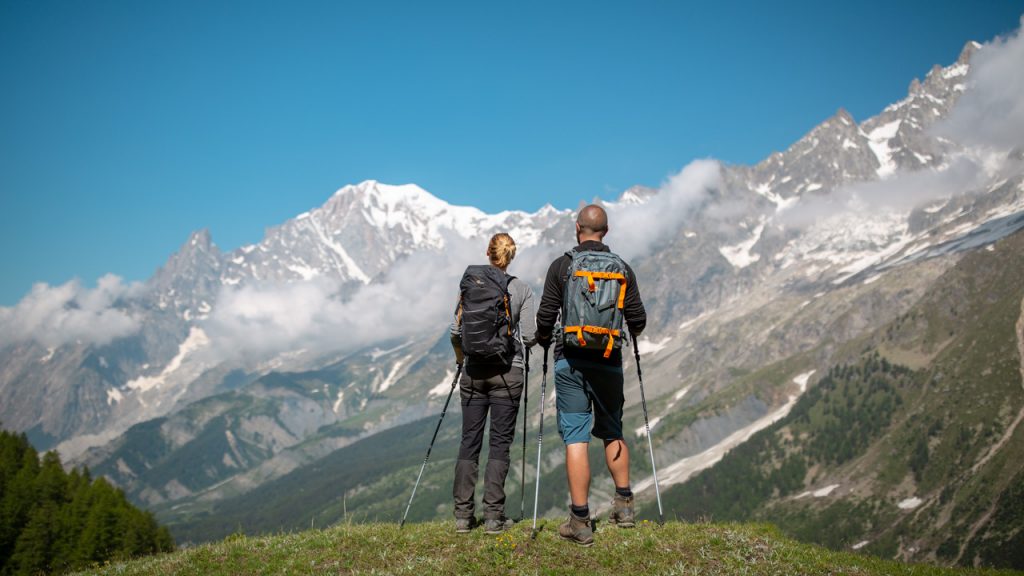
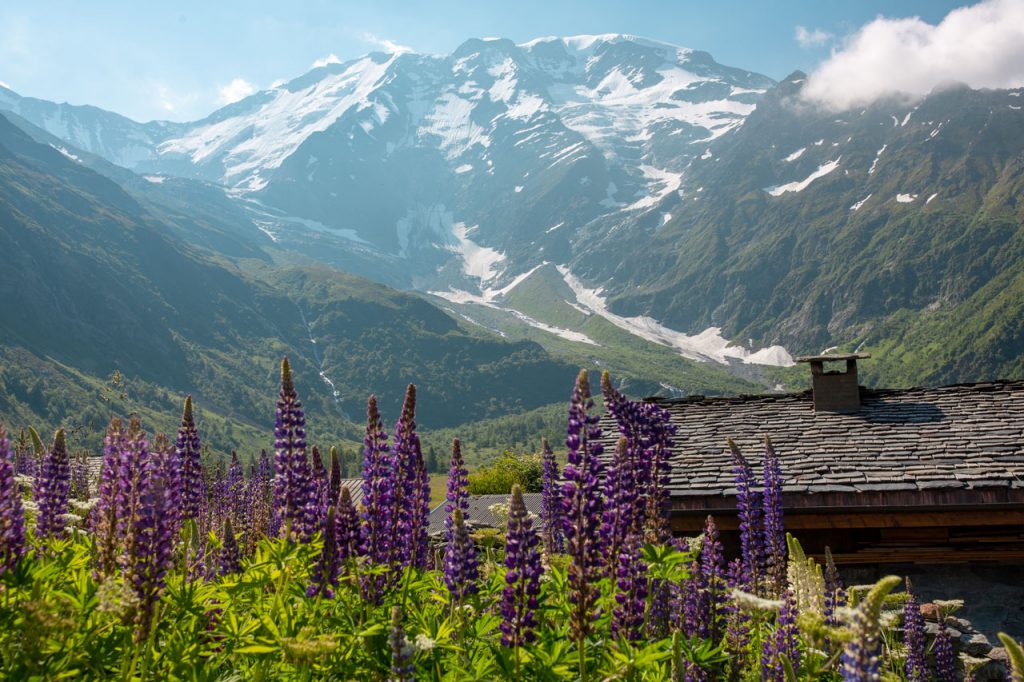
Mont Blanc’s 4.808 m high peak rises above an impressive mountain range in the Alps known as the Mont Blanc massif. It stretches across three borders – France, Switzerland, and Italy – and consists of huge glaciers and no less than 400 mountains. The route therefore not only takes hikers through a fabulous and varied mountain landscape but also thru different countries, each with its own distinctive character.
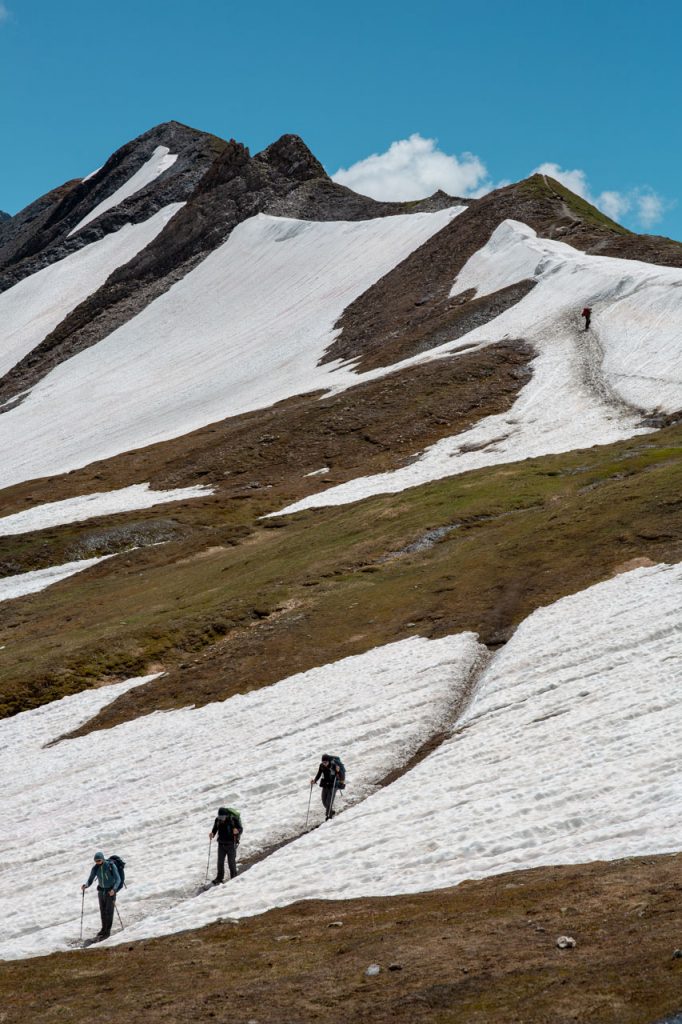
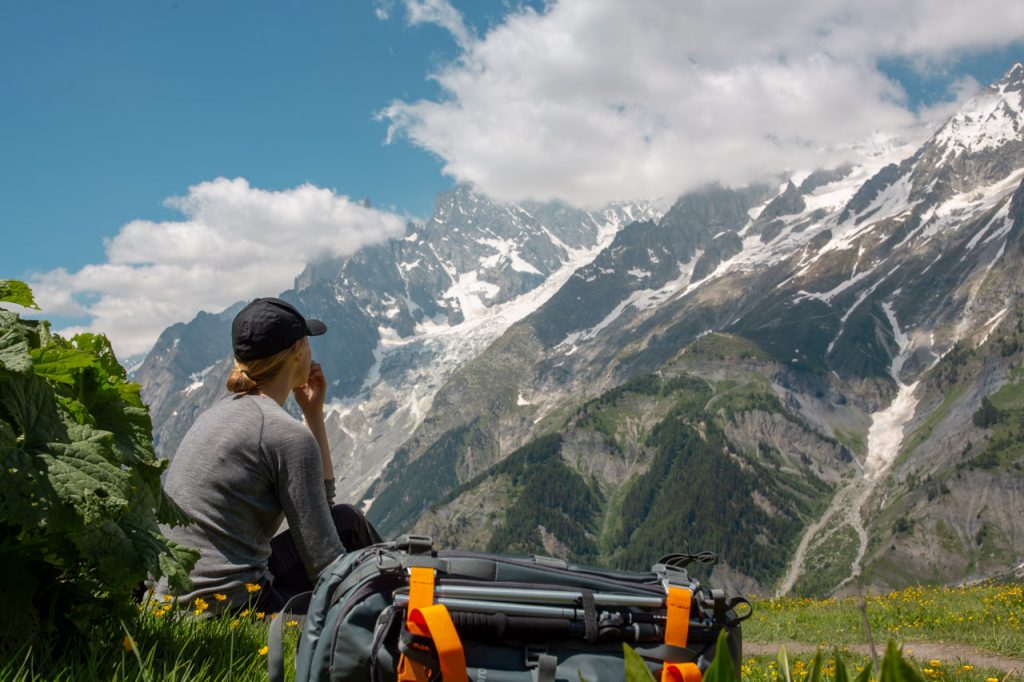
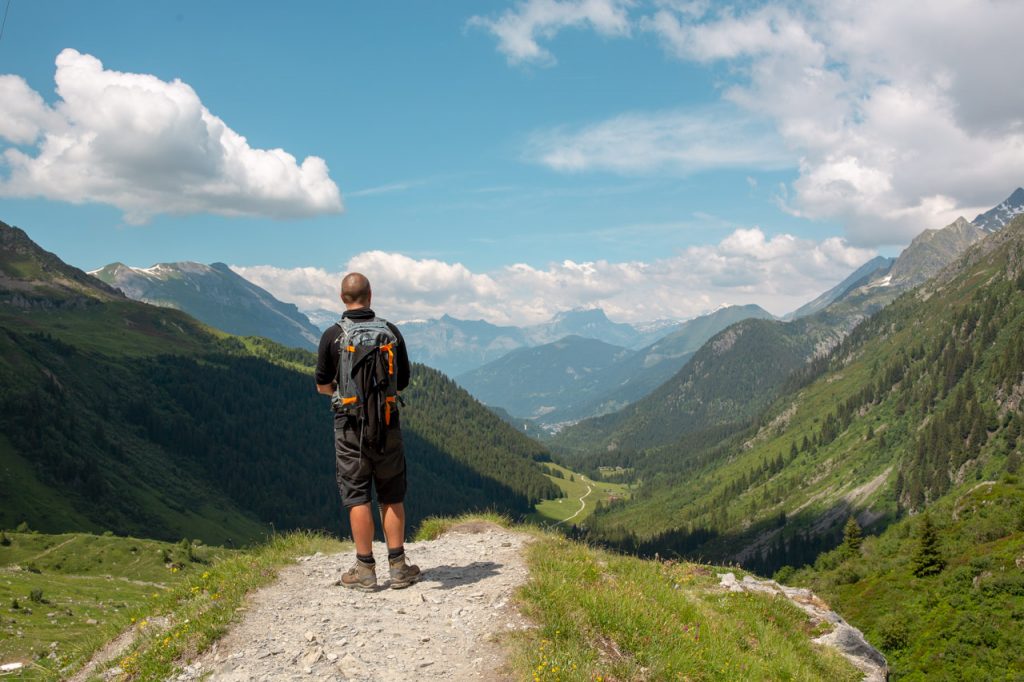
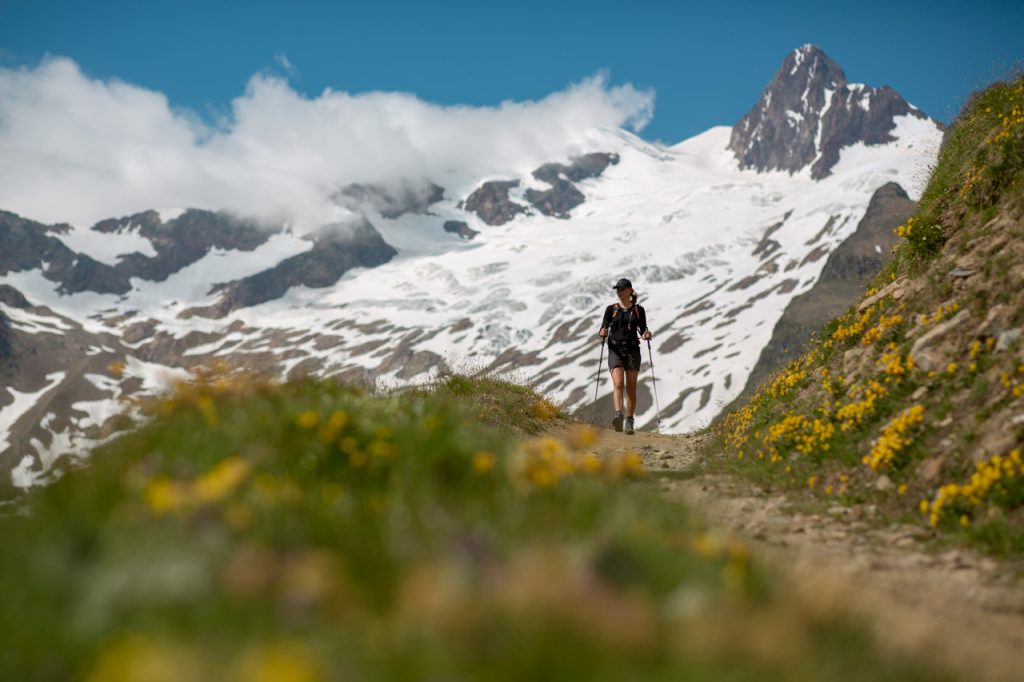
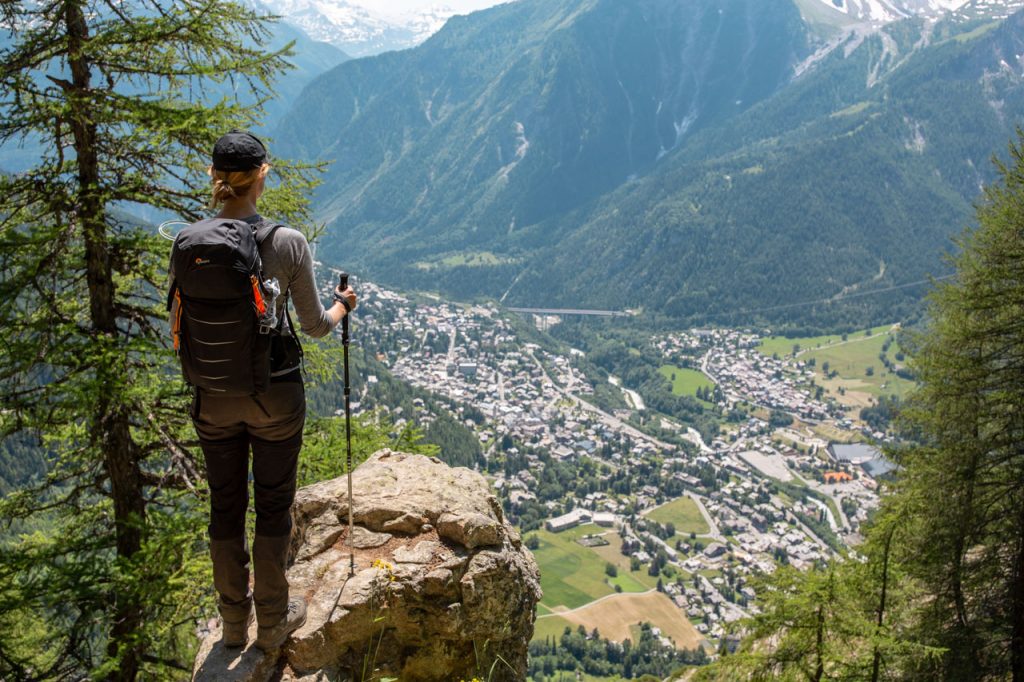
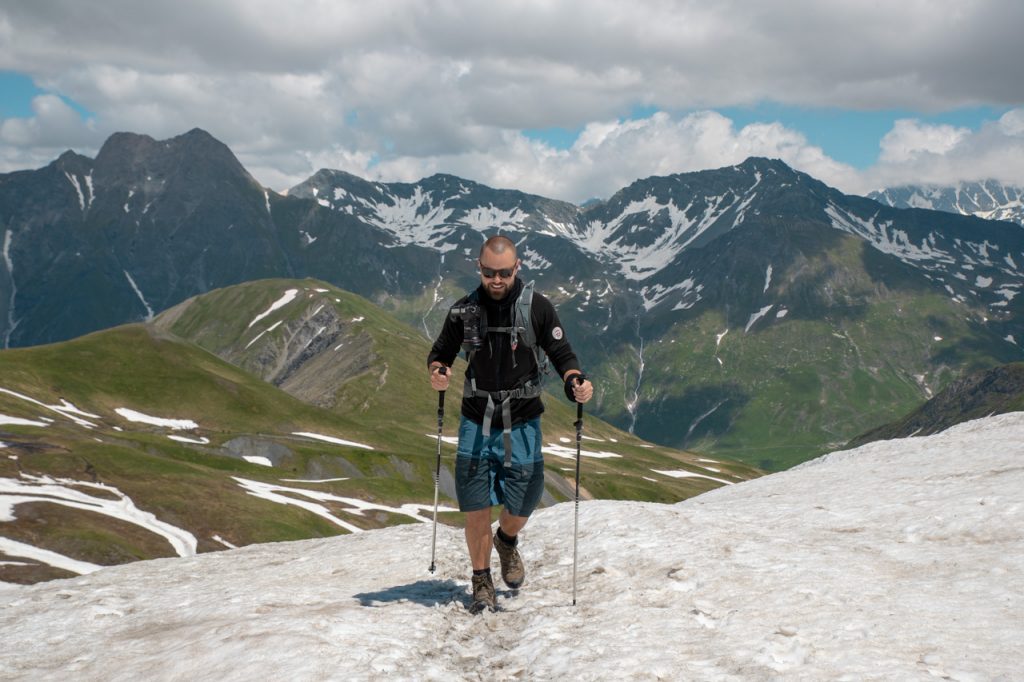
However, Mont Blanc’s snow-covered summit itself can be difficult to spot from all stages of the tour. In addition to the fact that the top is flat and wide and not pointed, as children draw jagged mountains, Mont Blanc stands shoulder to shoulder with 40 other rival peaks that rise above 3,000 m in the air and sometimes steal the direct view to the King of the Alps. But that only makes the experience even greater. Because the view is forever changing and constantly attractive.
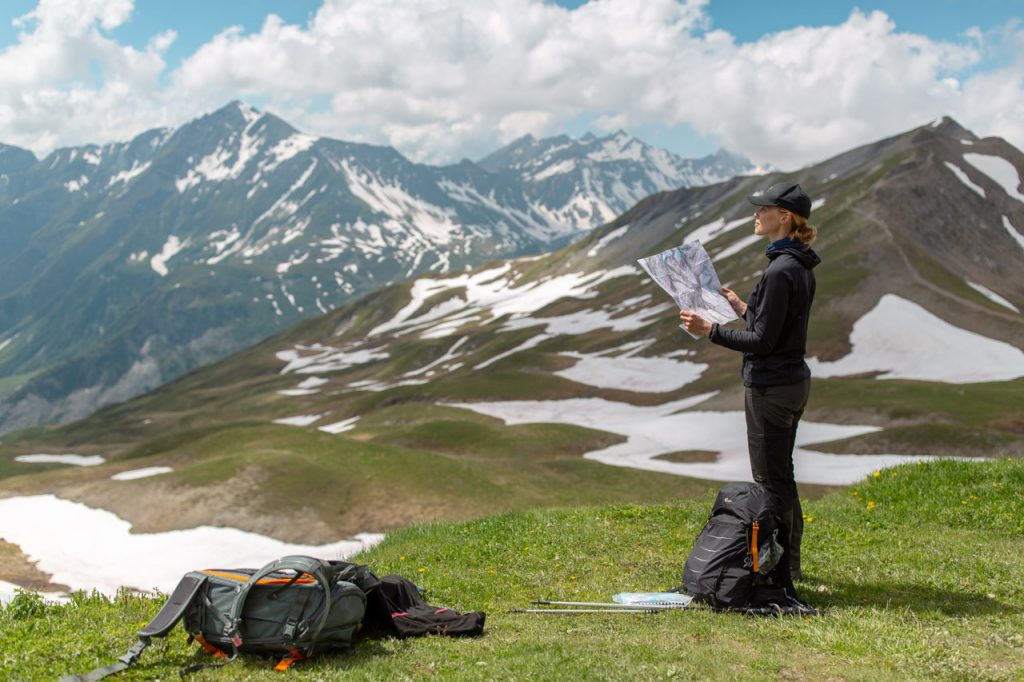
On the cover photo you can see Mont Blanc’s white, wide peak: It is just behind us – right where Mette’s right hand is in the air.
#2 – Different routes
Since the naturalist Horace Bénédict de Saussure, first walked around Mont Blanc in 1767, thousands have followed in his footsteps. Today there are several versions of the official route. Some are harder than the original, others easier. Depending on which one you choose, you can do the whole tour in between 9-12 days. Or skip a few stages by using the local buses that run between the mountain towns along the route.
We skipped two stages and hiked for 7 days. As beginners in mountain hiking, we didn’t want to tempt faith. But now we know that we could easily have made the entire trip. If you doubt yourself, but at the same time really want to hike the entire distance, you can consider taking a day off when you pass through one of the larger cities, e.g. Chamonix (France), or Courmayeur (Italy). Find info and maps of different routes HERE.
#3 – Tour start
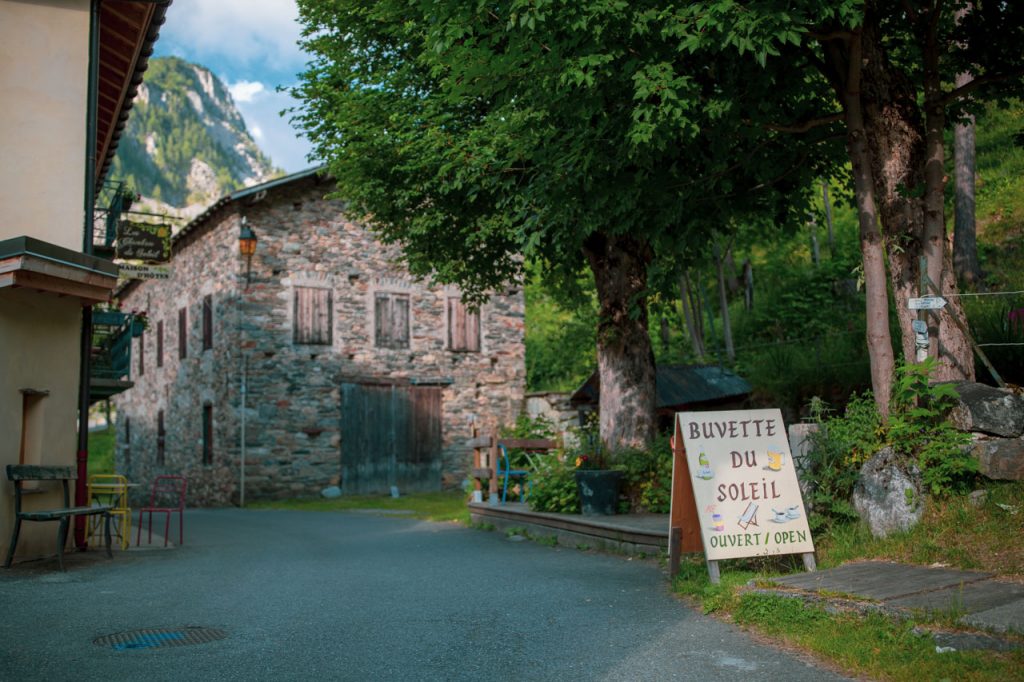
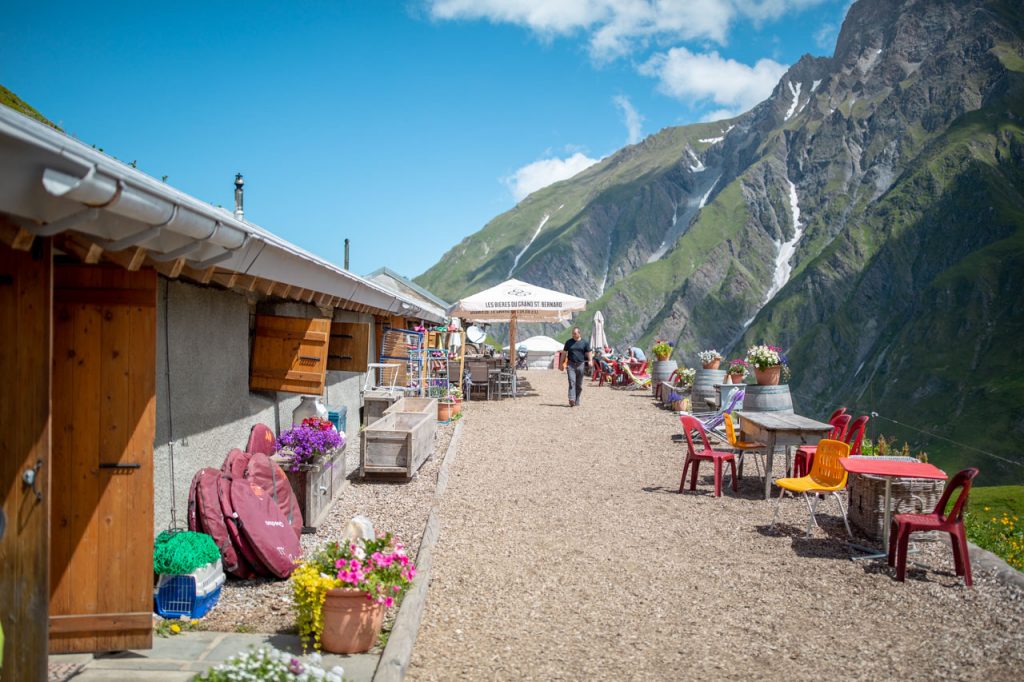
The French Chamonix valley is the classic starting point and ditto terminus for the hike around Mont Blanc. However, you can also cleverly start elsewhere or simply enjoy a single stage from wherever you prefer. Either way, Chamonix is a great place to refuel. There are plenty of cozy hotels, restaurants, and sports shops here.
If you stay overnight in Chamonix, you can use the free buses that run between the towns in the valley. Simply ask for a bus pass at your hotel. In addition, you can also explore the Mont Blanc massif from above by taking the world’s steepest cable car. It runs up to the Aiguille du Midi Mountain at 3.842 meters, from where you have a fascinating panorama in addition to a landscape of mountain peaks.
#4 – Clockwise or counter-clockwise?
Originally, the Tour du Mont Blanc was established as a route that you hike anti-clockwise, which most people still choose to do. Our trip brought us the opposite way, and to us, it seems to be an advantage. This meant that we didn’t have to walk behind many other hikers. Also, it was especially convenient when we were unsure whether we were on the right track and what challenges lay ahead. Here we could simply ask the passers-by who just traveled the way we were going.
#5 – Comfort trek
We chose a so-called comfort edition of the Tour du Mont Blanc, where a travel agency plans a route and forwards hiking maps and a Topo guide in advance. In addition they book the accommodations and arrange for our luggage to be transported from cabin to cabin every day. It gave us the freedom to hike on our own, but without having to worry about planning a reasonable route, finding shelter every night, or lugging a full pack.
#6 – Topo guide
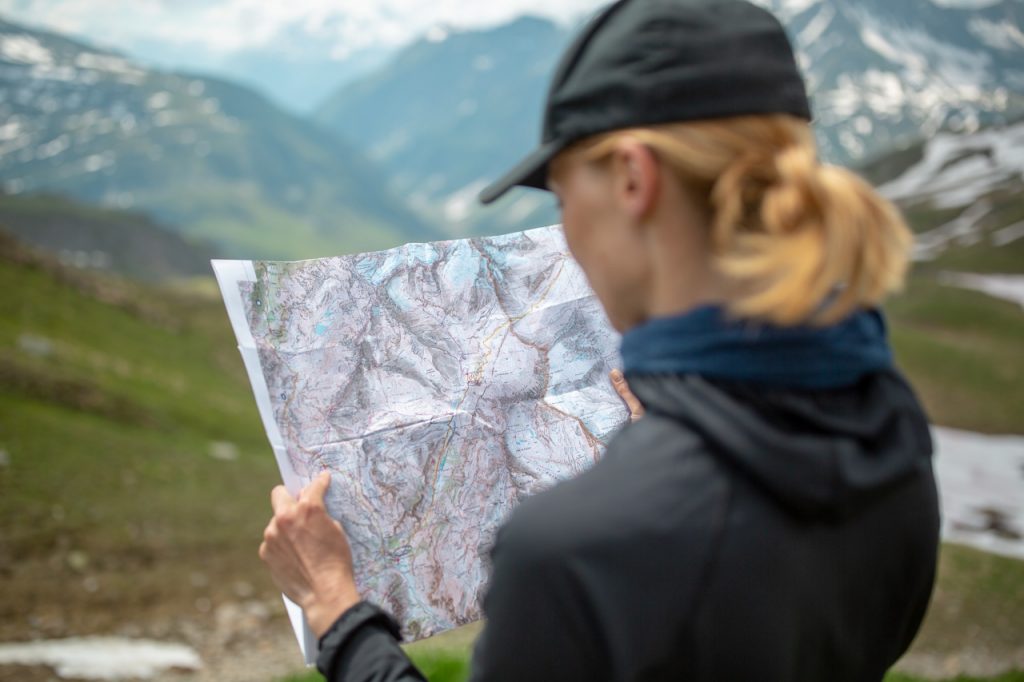
Erm, what is a Topo Guide, you might be thinking? Because we did. The word comes from ‘topography’, which is a geographical term for describing the landscape – i.e. height, characteristics, and surroundings. The Topo guide is a form of treasure map that describes landmarks along the path and thus helps you stay on the right path.
#7 – The art of finding your way
When you have neither been a scout nor an orienteer, are you then lost when it comes to reading hiking maps? Before leaving, we were excited to see if we could find our way through the mountains ourselves. A concern that was fortunately as unnecessary as the GPS on our iPhones. With the help of the Topo guide, maps with markings of the route, and the official markings on the trails, we managed to find our way from cabin to cabin all the way around Mont Blanc without any problems.
#8 – Official cards
The Tour du Mont Blanc is marked on two official maps, which together show the entire hiking route. Respectively they are called ‘Chamonix Massif du Mont Blanc’ (3630 OT) and ‘St. Gervais’ (3531 ET).
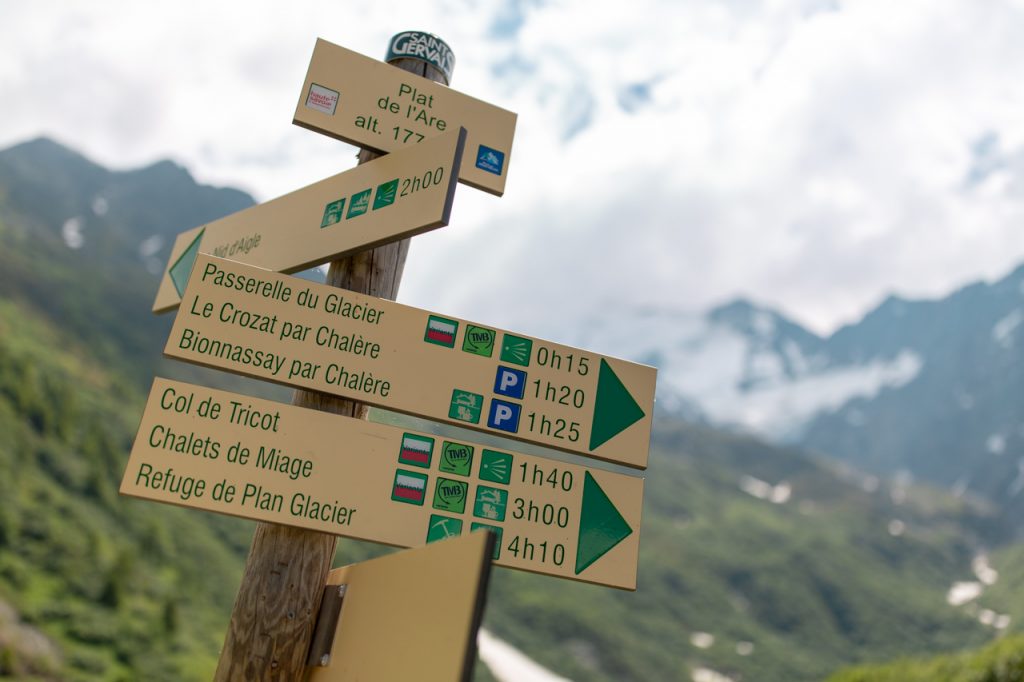
#9 – Marking of the route
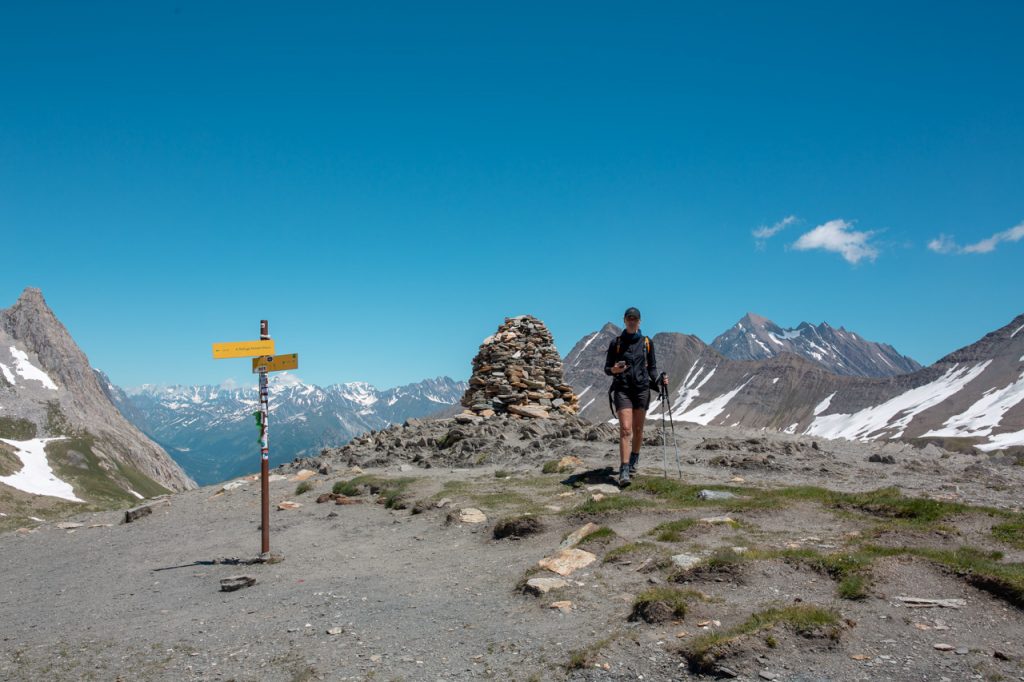
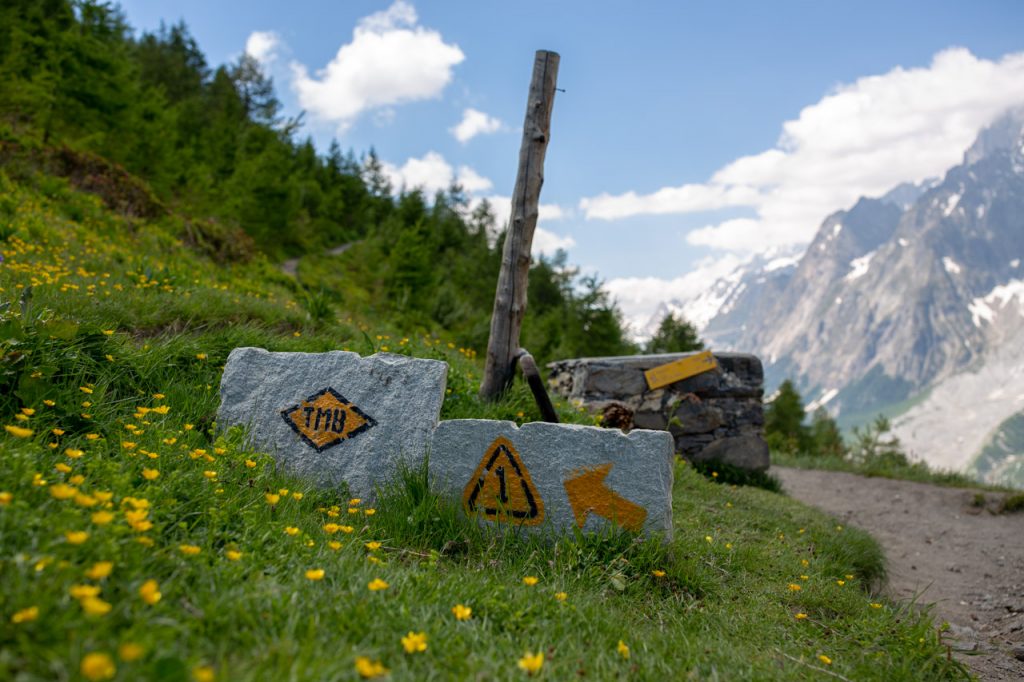
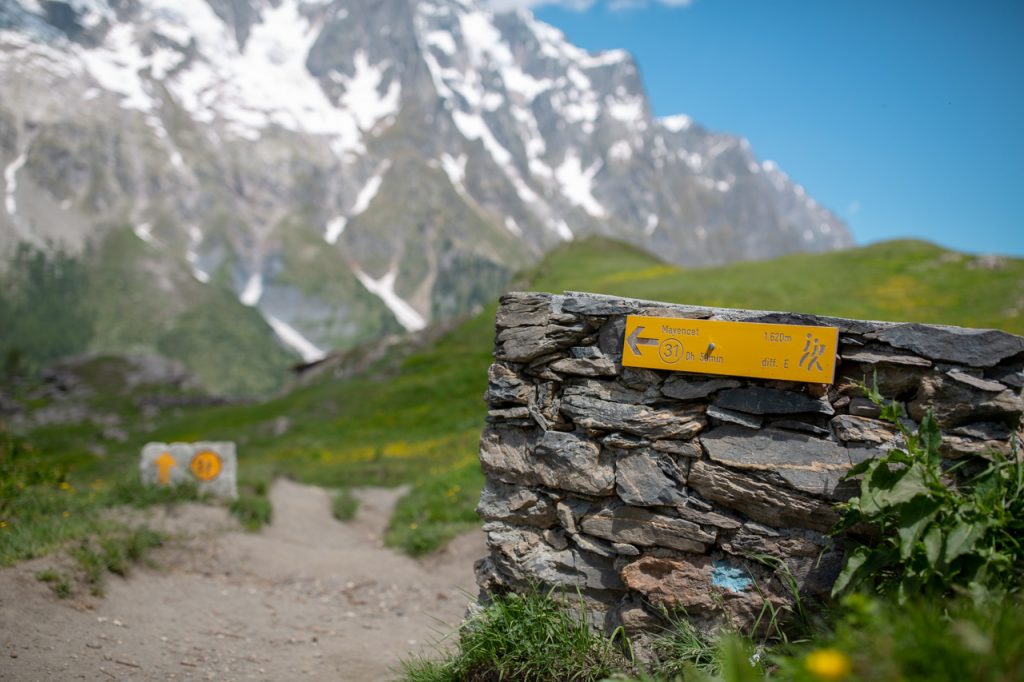
Tour du Mont Blanc is officially marked with a mixture of red-white and yellow-black signs or green circles with the abbreviation TMB. You will find the signs painted on everything from rocks to tree trunks. And in the places where several paths meet, there are often signs indicating the direction, altitude, and walking time to nearby landmarks, mountain passes and towns.
#10 – TMB with guide
If you prefer hiking with a guide who can show you the way and at the same time tell you a little more about nature and the area. Then there are several travel agencies that organize guided group tours around Mont Blanc from approx. 5,000 kroner. Here you can also choose whether you want to carry your luggage yourself or have it transported between the accommodations every day.
#11 – TMB on your own
The good marking of the path and the many accommodation options along the route make it easy for the slightly more experienced to plan and hike around Mont Blanc themselves. The entire trip is usually completed in 9-12 days. The book The Tour of Mont Blanc by Kev Reynolds is a popular guide that tells you everything you need to know about the route, booking cabins, practical, and historical info.
#12 – Hiking trails
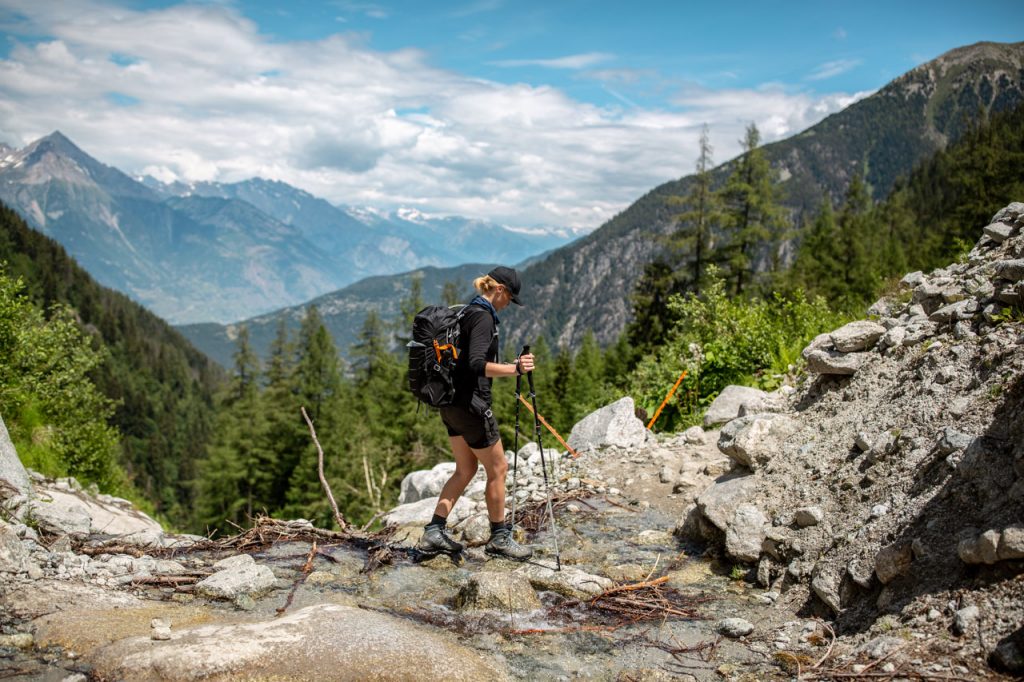
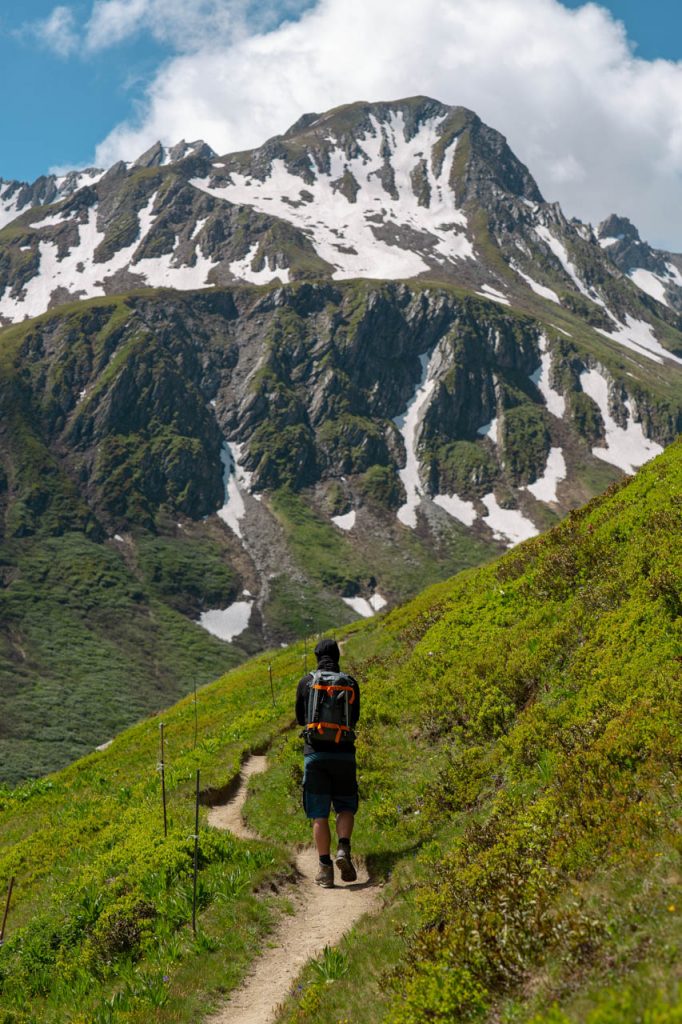
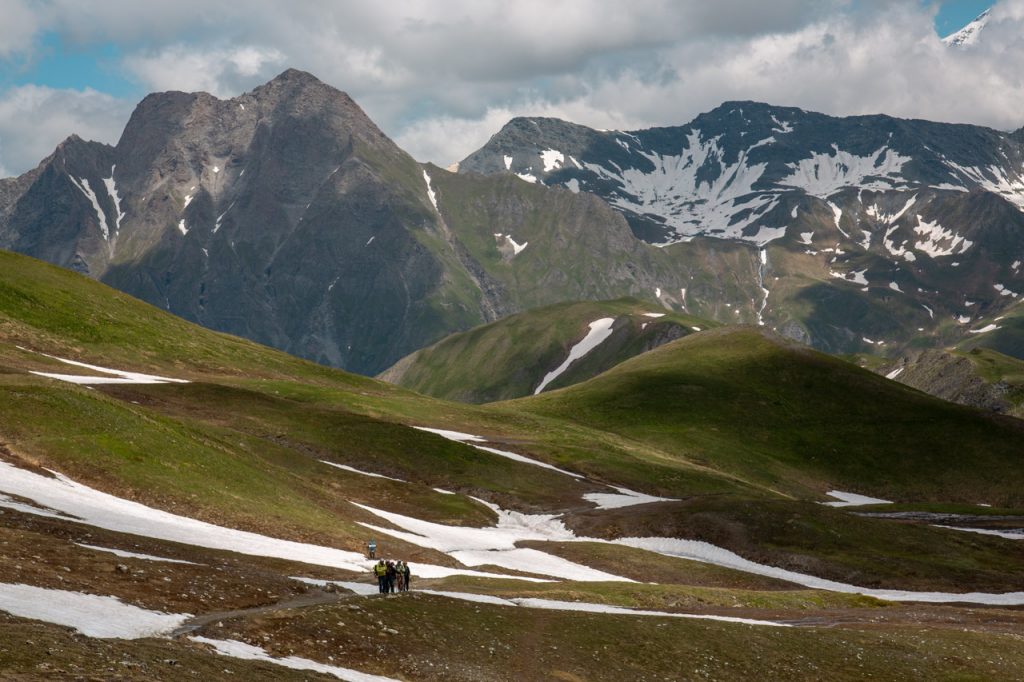
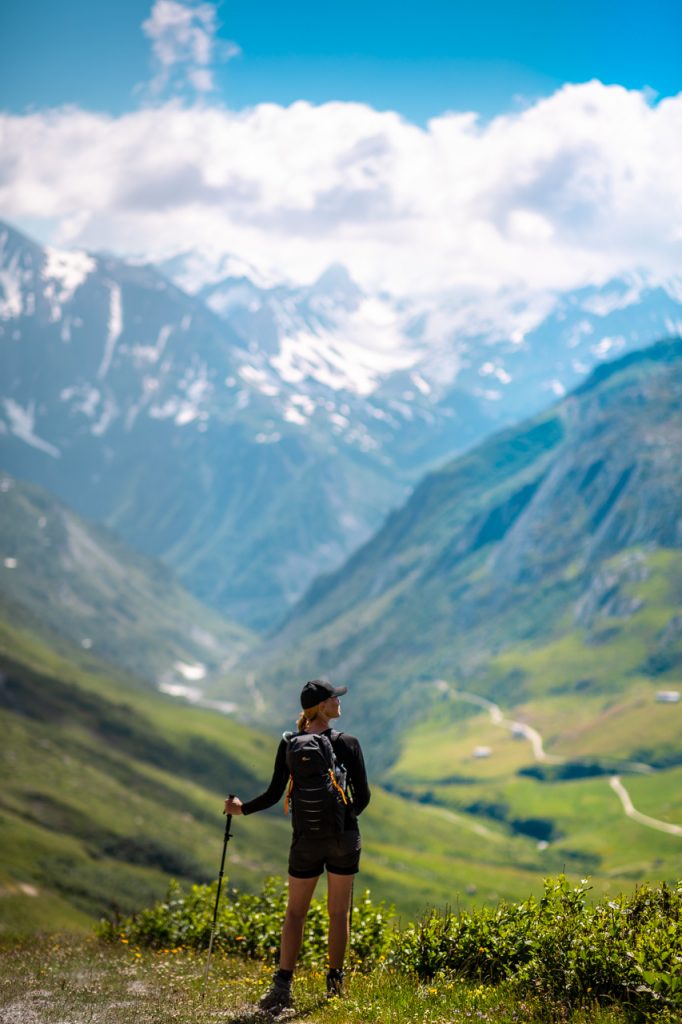
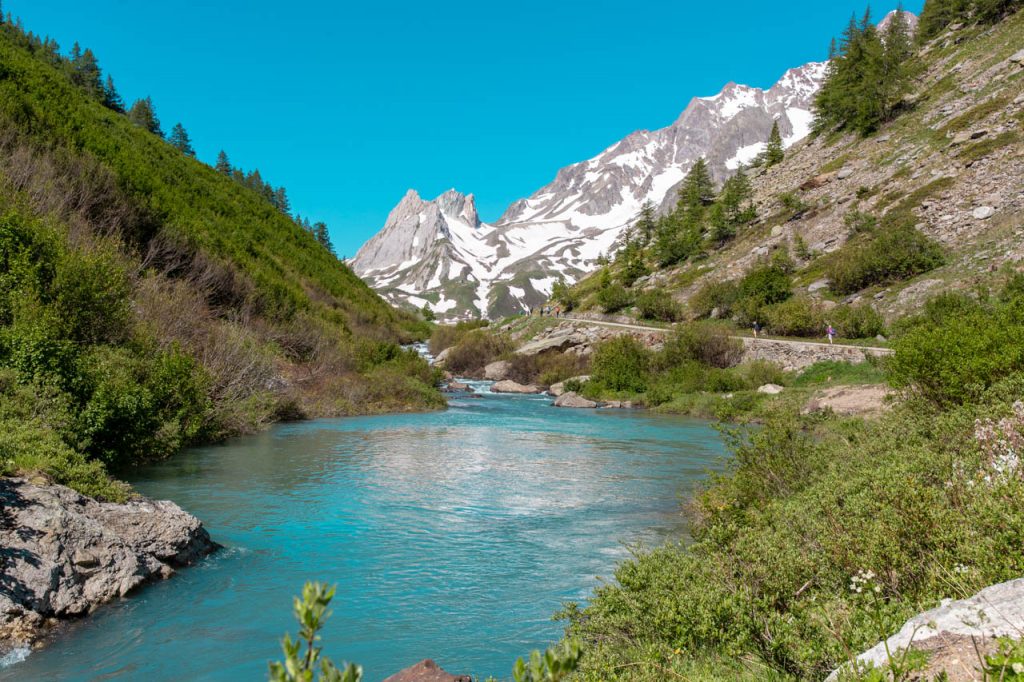
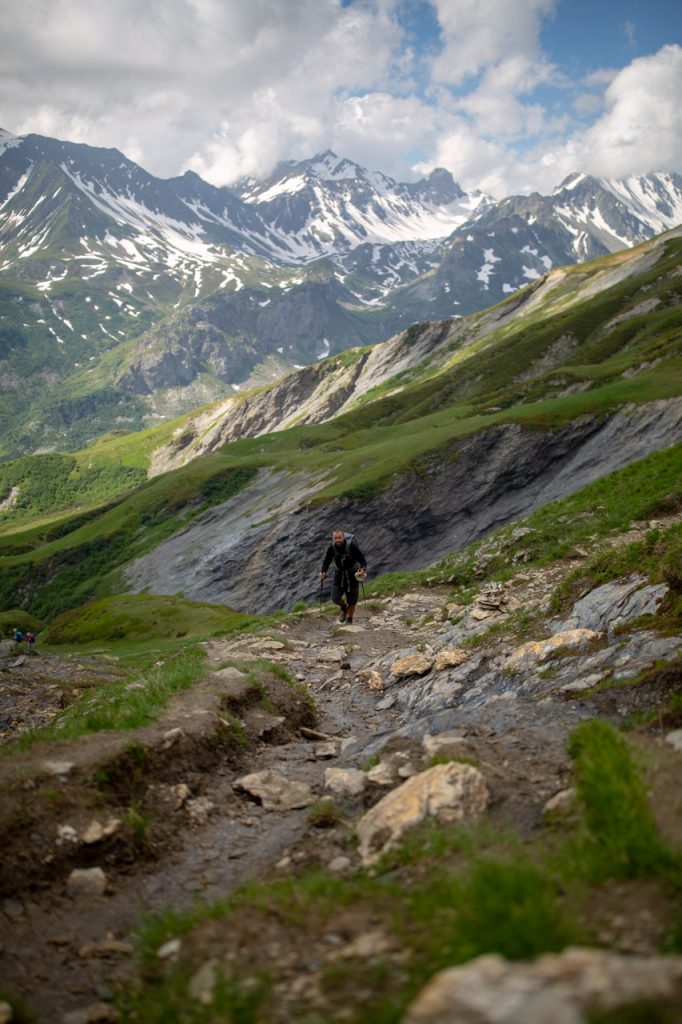
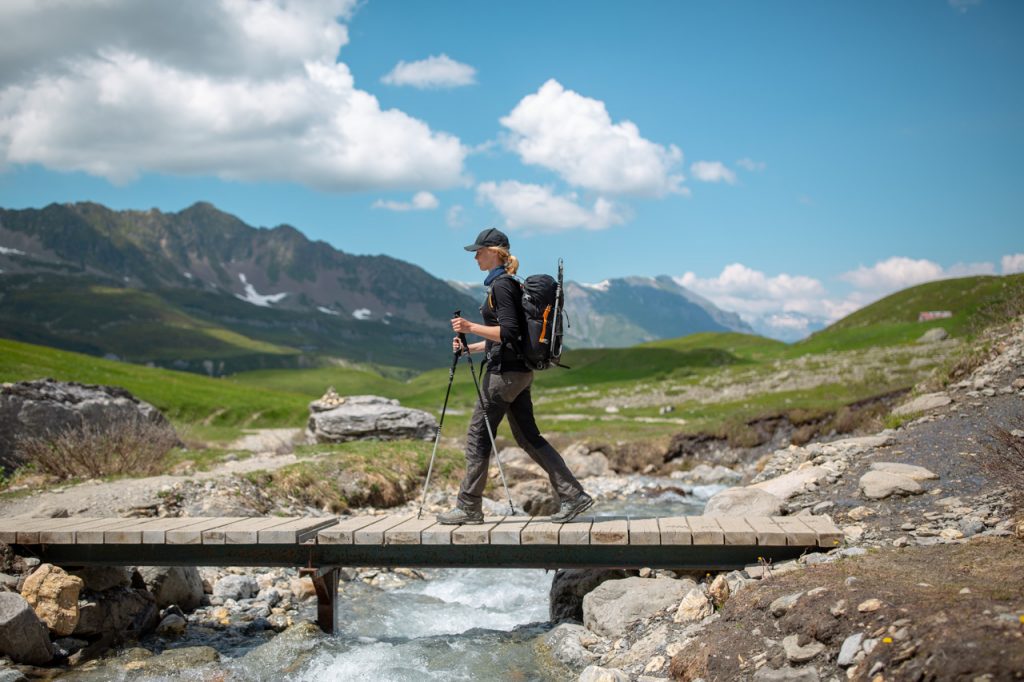
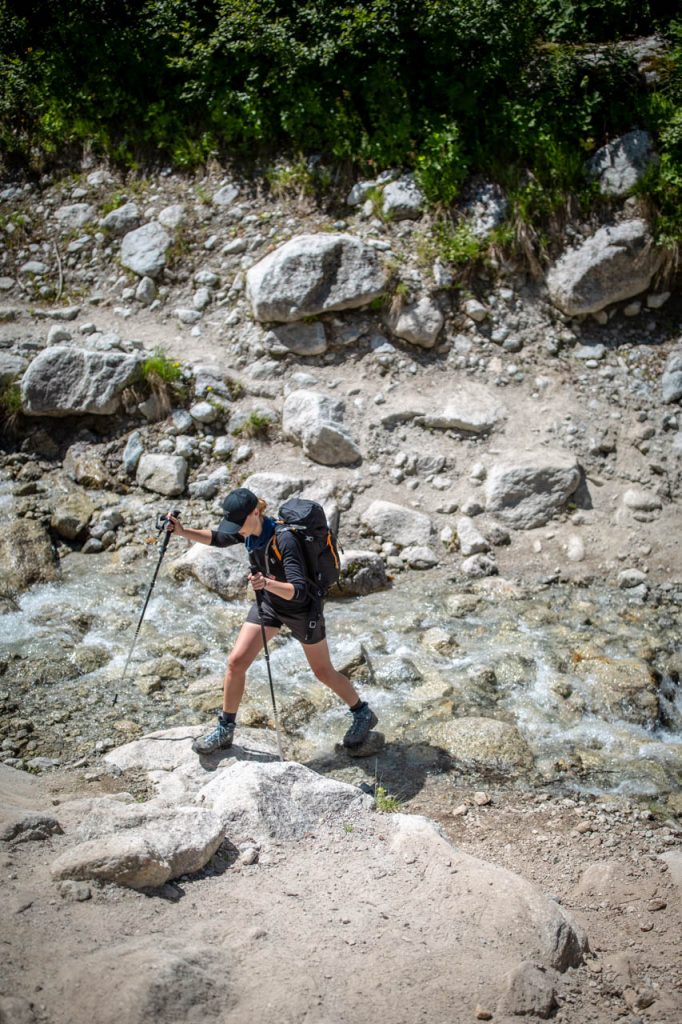
What we liked best about the Tour du Mont Blanc is that you rarely walk on tarmac or busy roads. The route takes you over vast and sky-high mountain landscapes where cars cannot get through. You pass through coniferous forests and flower meadows, along deep valleys and rushing rivers, and across snowy peaks and windswept mountain passes.
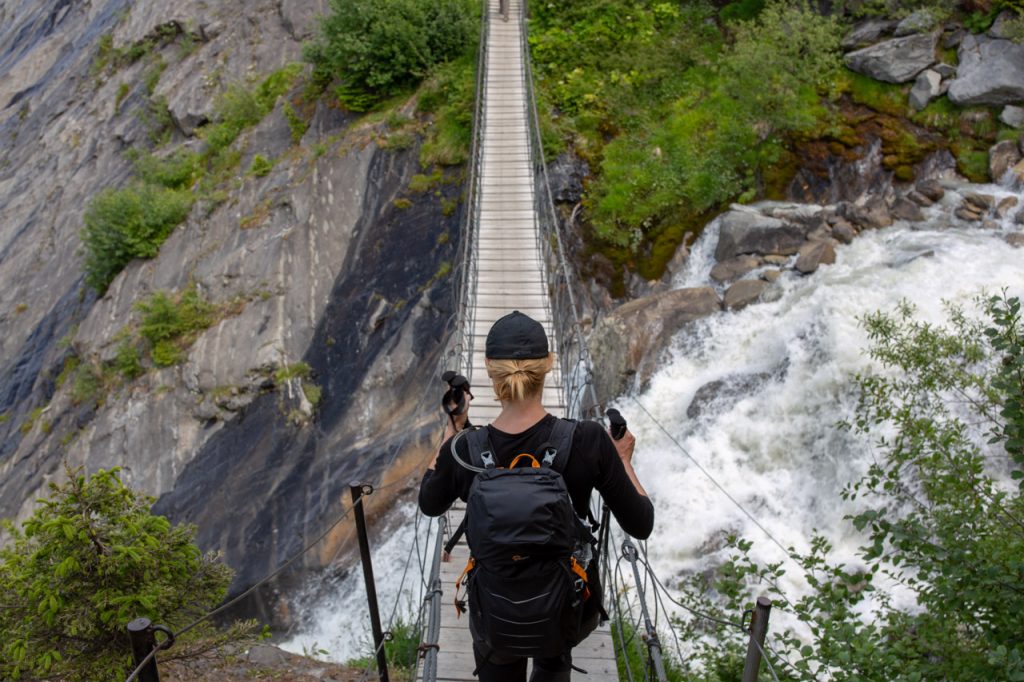
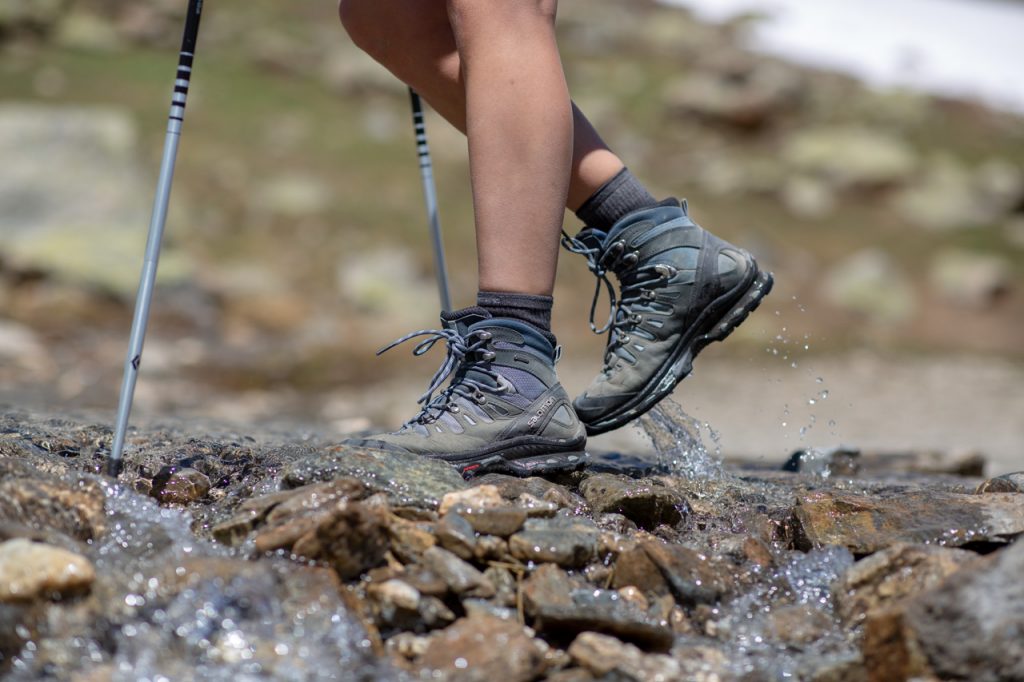
The trails are primarily a mixture of forest roads, mountain paths, and in some places narrow mountain ridges. During the trip, your hiking boots will walk on everything from hard gravel, large rocks, jagged rocks, and soft grassy soil, but also through streams and longer stretches of snow, tree roots, and loose stones. In addition, we crossed a single suspension bridge across a large mountain river.
Sometimes you can see the trail so far that it just looks like a pencil line on the horizon. At other times it winds around green hillsides or disappears behind the ridge of a steep climb. Occasionally you cross tracks with other trails, but often there is only one. So, the only thing you have to concentrate on is putting one foot in front of the other. And enjoy the show!
#13 – Best time to hike
The season extends from mid-June to mid-September. Most hike the Tour du Mont Blanc in July and August. Weather-wise, these are some great months, but due to the great popularity of the route, it is worth considering whether you can hike the trip before or after the high season. In some places the trails are narrow and can create bottlenecks with a lot of traffic. Remember to book the cabins well in advance, as they fill up quickly.
Most guides, therefore, recommend the end of August and the beginning of September as the most optimal time. Here there are fewer hikers on the paths, the snow has melted, and the condition of the trails is good. But in terms of weather, it’s beginning to get a little cooler and the days shorter.
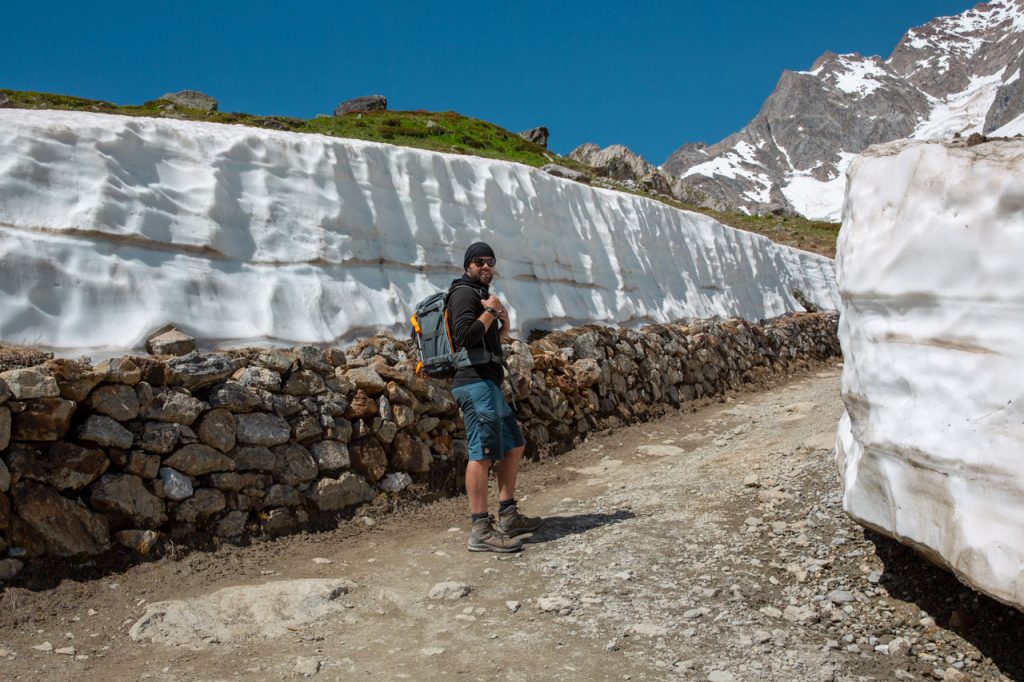
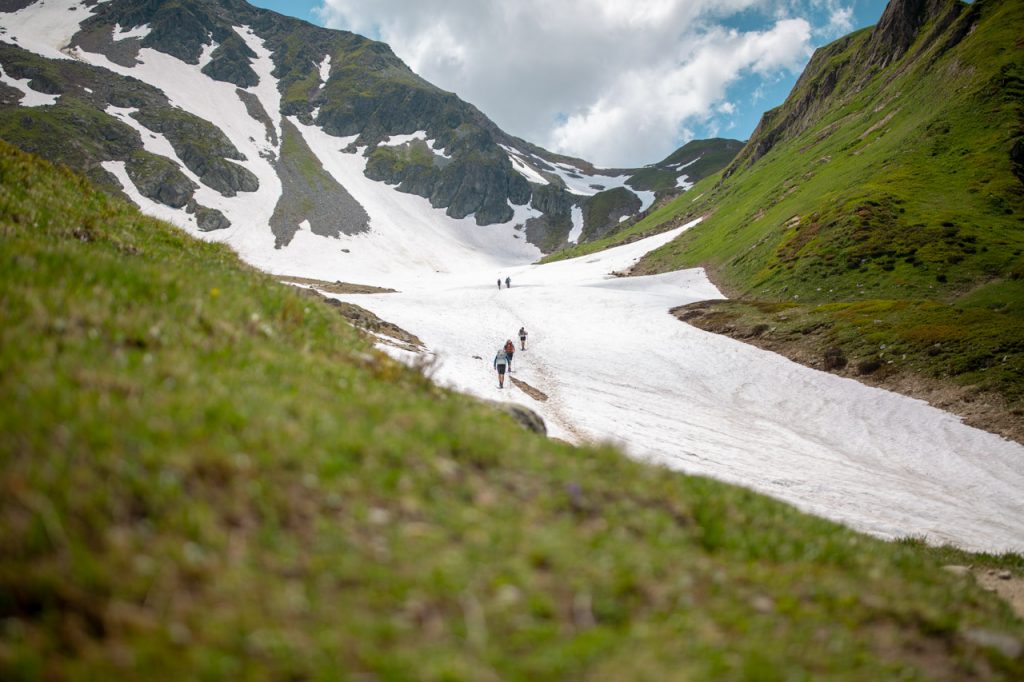
We hiked TMB at the end of June, which brought a few minor challenges as there was still a lot of snow on the trails and the meltwater increased the flow in the small streams. On the other hand, we met fewer hikers, and enjoyed the view of the beautiful colors of the snow-capped mountains. The greenness of spring paraded, the flowers started blooming, and the many islands of snow lit up in strong contrast to the granite grey and green giants.
Find official updates on the nature of the route HERE.

WHAT DOES A SUCCESSFUL COMPLETION TAKE
Difficulty
TMB is classified as a difficulty level 3-4. It requires neither technical prerequisites, advanced gear, or years of experience. But if you hike without a guide, it is an advantage to have a little hiking experience. The biggest challenge, however, is the physical one, as you mostly hike on steep paths that every day will bring you roughly 650-1500 meters of altitude up – and the same down.
The length of the stages
The individual stages are typically around 14-25 km and take 5-7 hours to complete if you hike at an average of 3.5 km/h without breaks. It sounds unusually slow, but the stages run through mountainous terrain, where flat sections are a rare delicacy. Therefore, you should expect to walk at a relatively slow pace.
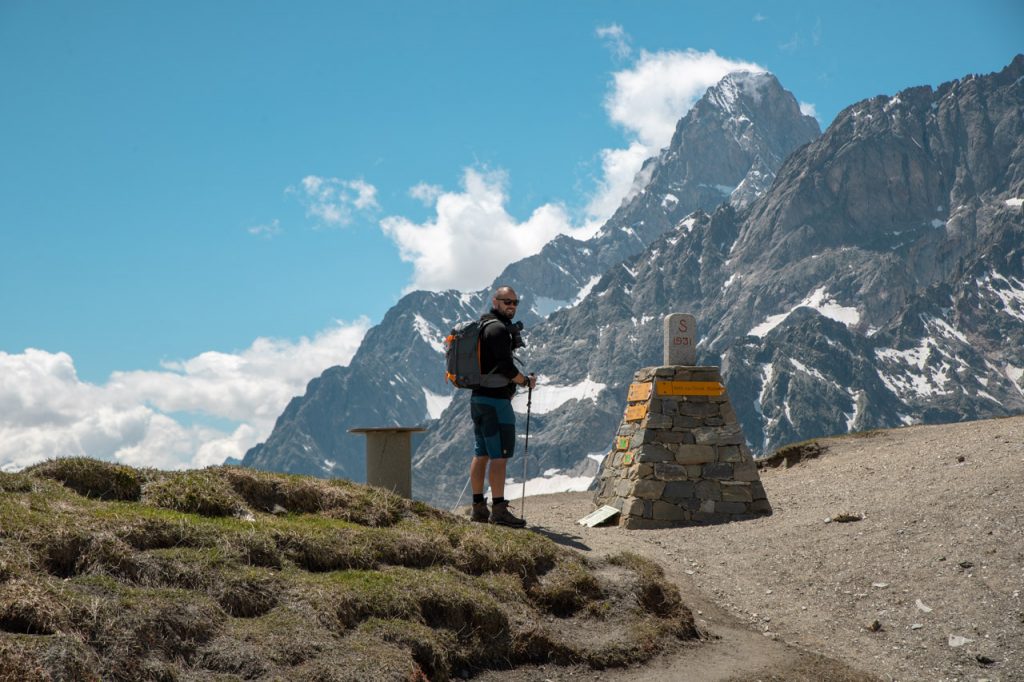
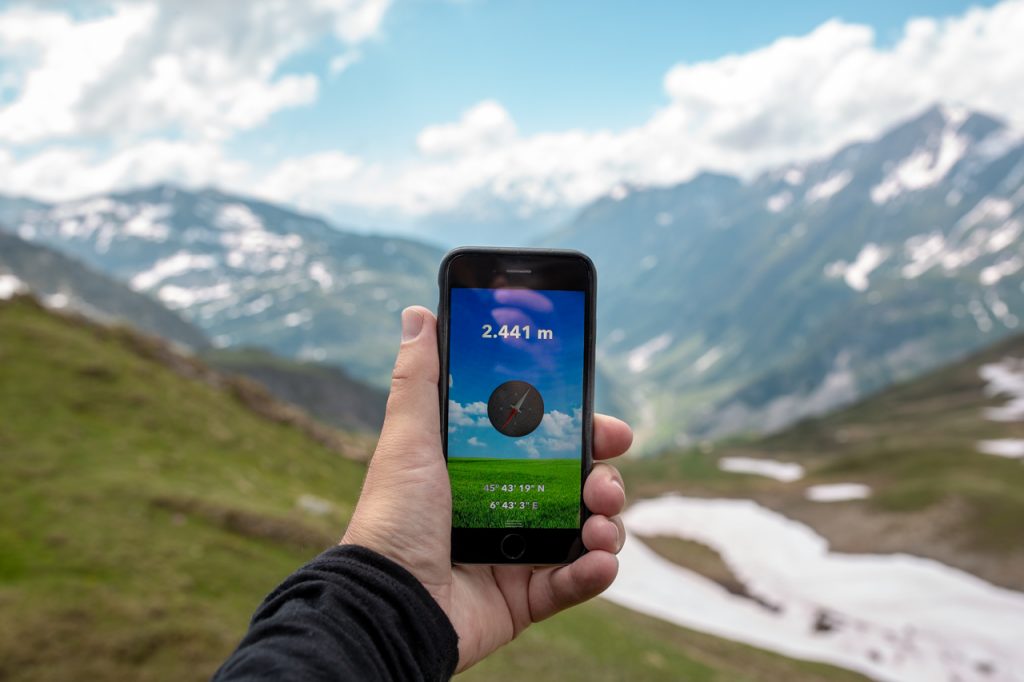
Highest point
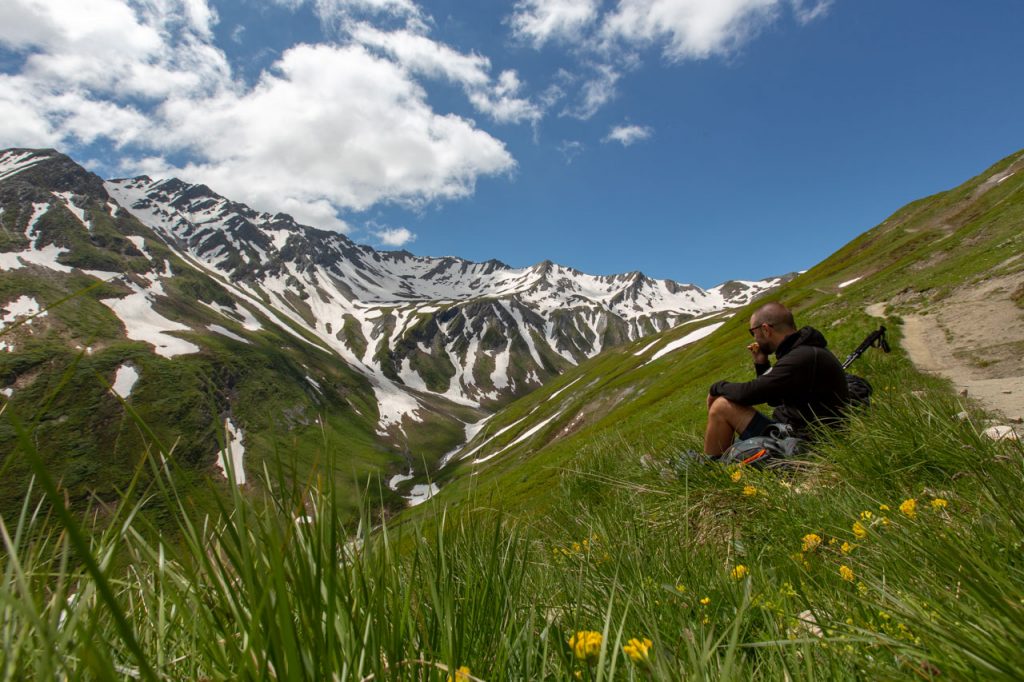
Depending on the route you choose, you hike daily over mountain passes at up to 2,600 meters in height. We quickly found out, however, that it is neither the length of the stages nor the highest points, but the total number of altitude meters up and down in one day that consumes the most energy. Fortunately, the efforts are amply rewarded in the form of wonderful views!
Each day we walked a total of 1,600-2,200 meters of altitude, and if you add up the total number of altitude meters of the entire trip, it is equivalent to climbing Mount Everest. After the Tour du Mont Blanc, you can add around 10,000 meters of altitude to your logbook – and pat yourself on the back!
Preparation
You don’t have to be an extreme sports athlete to complete the TMB. But good shape means more energy to enjoy the trip. In a flat country like Denmark, however, it is difficult to train for mountain hiking, so a combination of pulse and strength training 3-4 times a week is optimal. Spend the weekends on long hikes in hilly terrain, where you can wear your hiking boots and test your equipment.
Fear of heights
It is very individual what triggers people’s fear of heights. Martin has a tinge of fear of heights that pricks his shoulder at the sight of vertical slopes on open mountain passes. But he had no problem hiking around Mont Blanc. We mainly hiked over wide mountain ridges and along sloping mountainsides. Only in a few places did we walk on narrow ridges with deep drops, but none of them felt anxiety-provoking to pass. In the most challenging place, there was an iron wire bolted into the mountain wall, which you could hold on to as extra security.
ACCOMMODATION AND MEALS
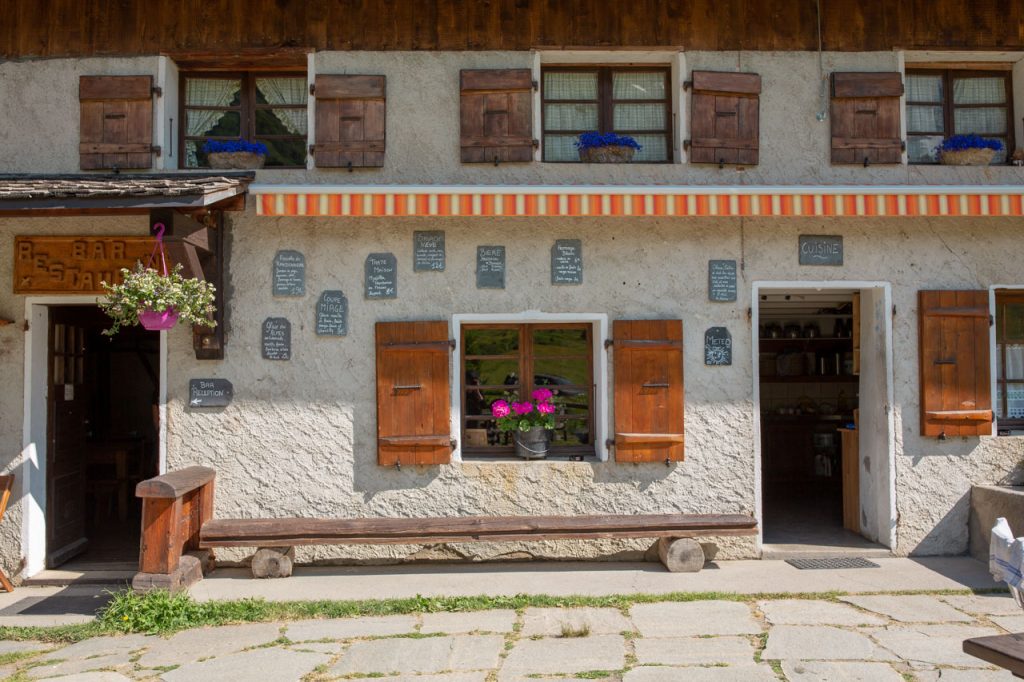
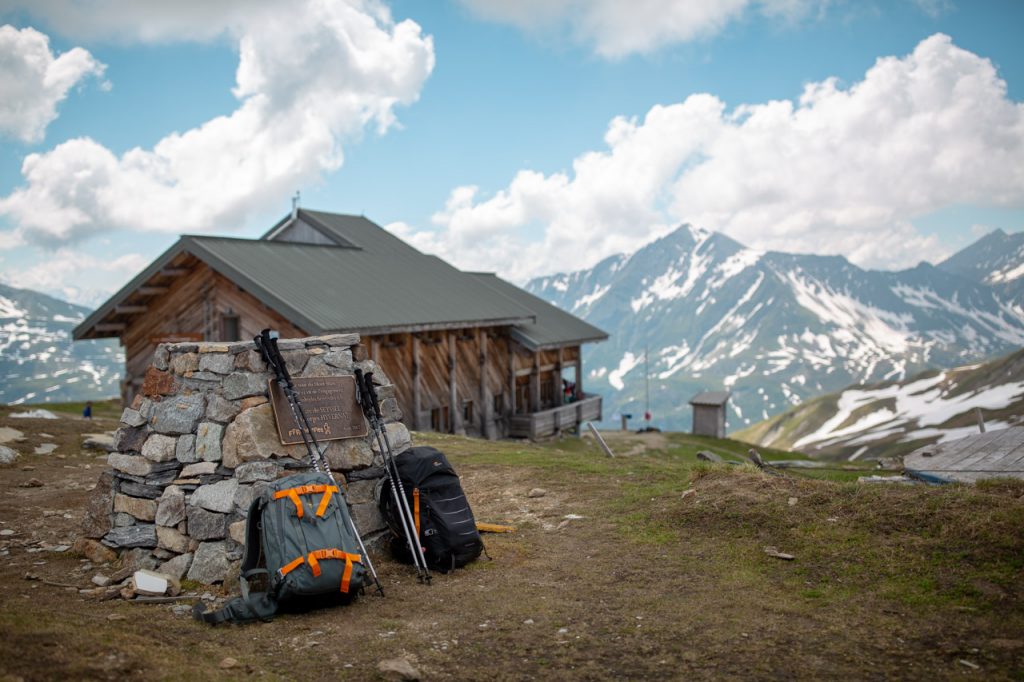
Cabins
If you choose a comfort trek, where you have your luggage transportet, you will primarily sleep in the cabins down in the valley, where a driver can reach by car. The stages therefore take you from a valley, over a mountain pass, and down again on the other side. Here you can choose to sleep in a dormitory or in your own room, which costs a little more. Bath and toilet are often shared either way.
If you hike with your own pack, you can choose to walk stages that take you from the top of the mountain pass, down into the valley and up again. Up here you can sleep in some of the alpine huts, which have breathtaking views and are only open in the summer period, as they are impassable in winter due to snow. Most of the time, they are quite remote, and cars cannot get there. So, the cabins offer a slightly more rustic stay and a bed in a dormitory.
Find more information about the cabins HERE – and see them located on an interactive map HERE.
Sleeping facilities
If you’re a light sleeper, it’s a good idea to bring night goggles and earplugs. Especially if you’re going to spend the night in dormitories. Also, check in advance whether the cabins have towels and bed linen available. If you sleep in a private double room, there are often towels and duvets. If you sleep in dormitories, you must expect to bring your own liner bag, which you can use under the bedspread.
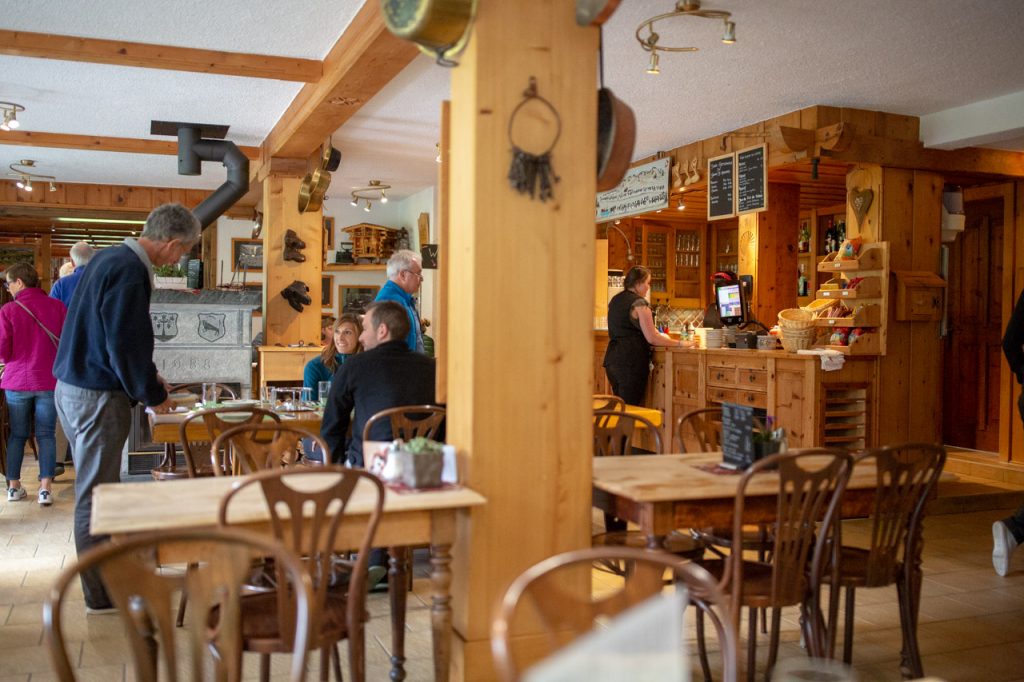
Breakfast
The cabins along the hiking route usually offer half-board and operate roughly according to the same setup, which is adapted to hikers’ routines and needs. Breakfast is served in the dining room between 7 am and 8 am, and the buffet typically consists of toast bread, butter, cheese, jam, fruit, cornflakes with milk and coffee, and tea. Bring a thermos from home if you want coffee in your rucksack. We saw several who were allowed to refuel in the kitchen before setting off.
Lunch
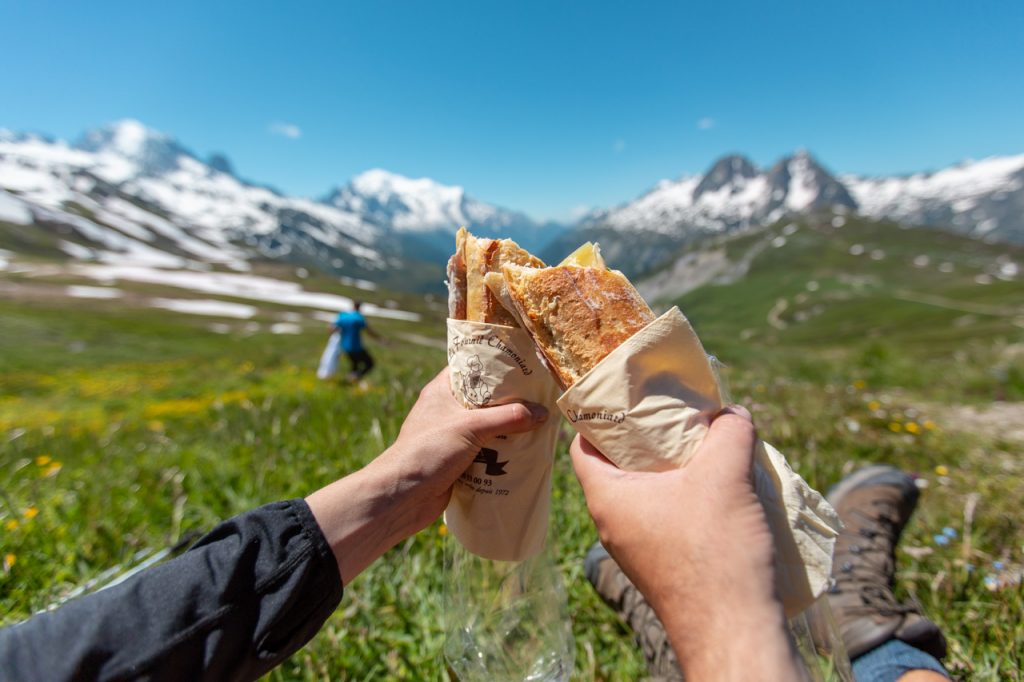
Depending on which route you choose, during the day you will pass huts where you can buy drinks and lunch dishes such as omelette, pie and sandwich and borrow the toilet. However, the cabins are only open in the high season. So please check whether the lunch stop you have planned to visit for the day is open.
We preferred to bring our own lunch so that we could choose where and when we wanted to eat. In these parts you rarely come across a supermarket, so every evening we pre-ordered a sandwich in the cabins, which the kitchen prepared in the morning. Often we could choose between a baguette with different fillings or a slightly larger lunch package that also contained snacks such as fruit, chocolate, and juice. Our sandwiches were between €3-12.
Dinner
The cabins serve dinner around 7 pm – 7.30 pm. It typically consists of a three-course menu from the local kitchen, where you can choose between two or three different variants of the main course with either red meat, poultry, or a vegetarian alternative. The side dish is often pasta or polenta and some vegetables. The starter is typically hot soup, and the dessert is cake or ice cream with fruit salad.
Beverages
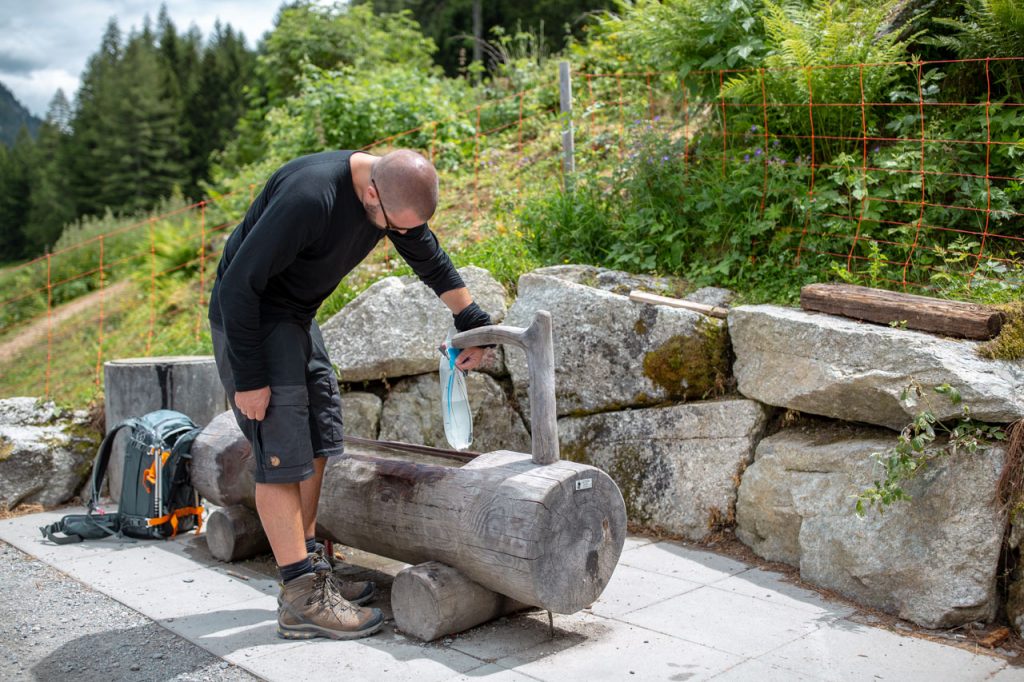
In the cabins, you can buy a selection of soft drinks, beer, wine, and some snacks. Out on the trails, you can find individual water troughs where clean mountain water flows through the tap, but you can’t count on them being available or in use. To be safe, you should therefore bring enough liquid for the entire day.
8 TIPS FOR GEAR AND CLOTHES
#1 – Hiking boots
Choose hiking boots rather than shoes. We were really happy with the solid sole and the extra support around the ankles, especially when hiking on steep paths, rocks, and stones. Also, we didn’t have to worry about wet socks when walking through snow and streams.
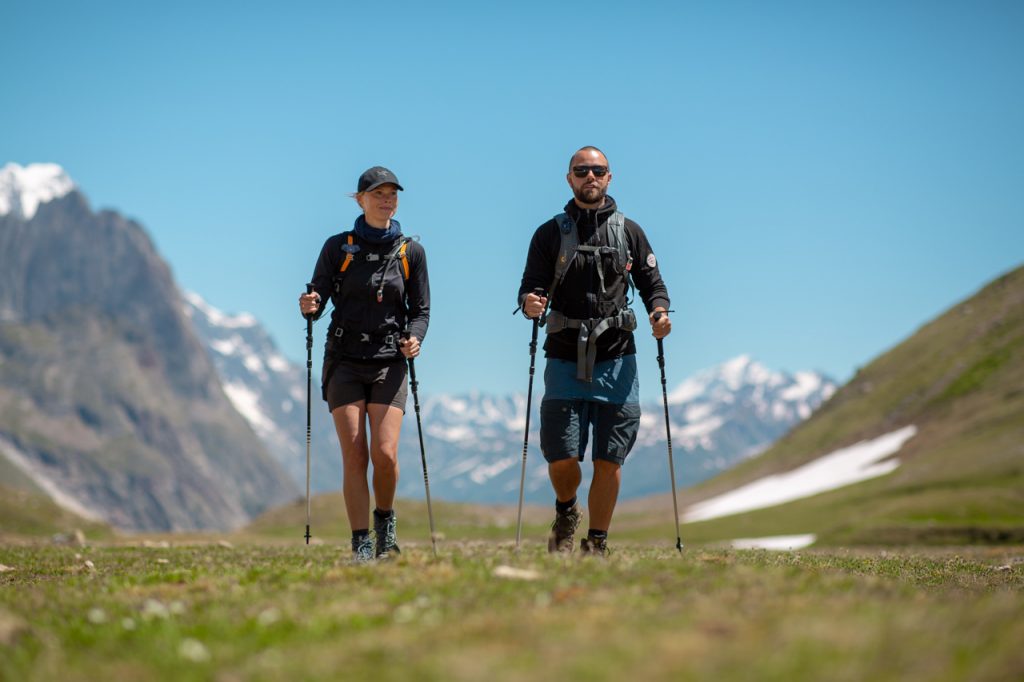
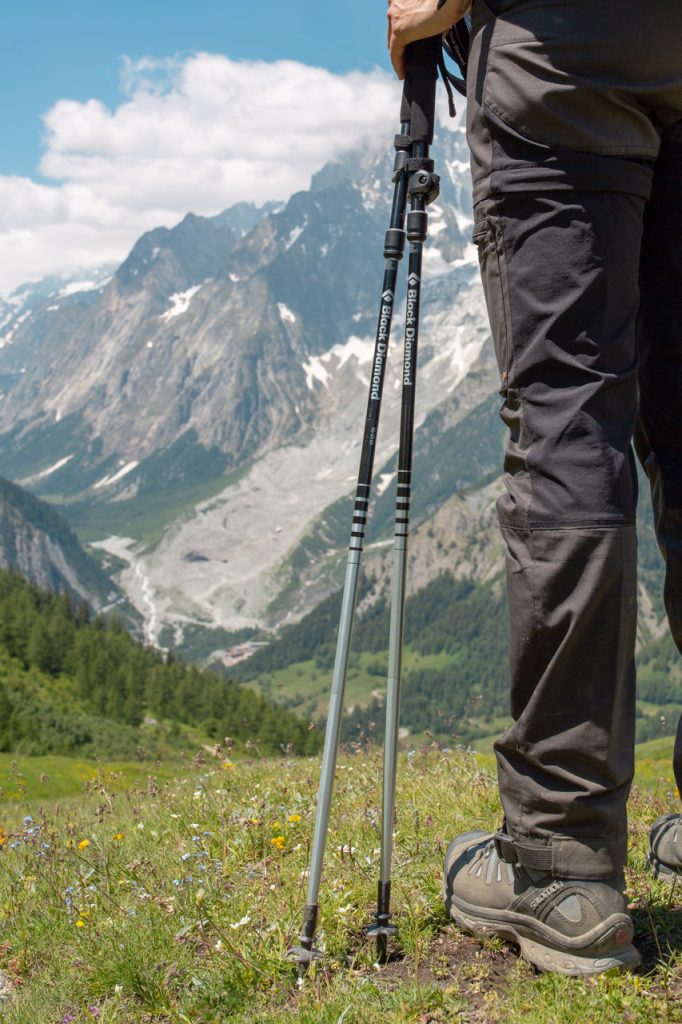
#2 – Walking sticks
Walking poles are a must. In addition to relieving the knees and legs, they also made it much easier to negotiate with uneven ground, loose rocks, and snow. It was surprisingly easy to fall on your behind due to the slope of the paths. In addition, they were reassuring support when we walked on narrow paths. We suggest choosing foldable hiking poles so you can easily clip them to your backpack when you don’t need them.
#3 – Buff
The buff quickly became our best friend. The stretchable neck tube in merino wool took up nothing in the rucksack and was brilliant as everything from a scarf, hat, and headband when the temperature suddenly dropped or the wind was chilly. We had two each and also used them to warm our hands on cold mornings or as light headgear to shield us from the strong sun.
#4 – Hiking clothes in several layers
In the mountains, the weather can change quickly, and during one day we experienced fluctuating temperatures from 10-25 degrees. A good tip is therefore to dress in three layers. The inner layer should preferably be in merino wool, as it acts as a sweat transporter and temperature regulator. Next layer could be a fleece sweater or similar, the last layer should be a shell jacket that is rain and windproof. Remember a hat, sunglasses, and sunscreen, as the sun is very strong in the mountains.
#5 – Favorite clothing
We loved our long sleeve merino wool underwear. They were warm under the jacket when it was cold, and very comfortable and fast drying when we were sweating and feeling hot. But in particular, we learned that when you use hiking poles, you easily get sunburnt forearms, as they are constantly exposed to the sun’s rays. The long-sleeved shirt made it easy to roll the sleeves up or down, depending on how strong the sun was shining.
#6 – Three-in-one pants
We also became fans of Fjällräven’s long hiking pants that zip off into shorts, making it easy to change on the go as the temperature rose and fell. A smart detail is that you can also use the separate trousers as ‘gaiters’ if you are wearing shorts and need to protect your bare legs in tall grass or snow.
#7 – Pamper your feet
They are the ones who will carry you all the way around the mountain. We gave them extra care from home with foot baths and foot cream, so that the skin was not dry and cracked. On the actual trip we gave them some talcum powder before putting on socks and boots. It helped the skin stay dry and soft – and none of us got blisters.
#8 – Your own water source
Although we prefer to buy as little fancy gear as possible, we were really happy to have so-called Hydraulics Reservoirs in the backpack. The water bags holds up to 2 liters of water and made it easy to take small sips of water continuously via a rubber hose that hung on the chest. We could drink without having to drop our hiking poles or grab our backpack every time. It is surprisingly recommendable!
5 THINGS WE LEARNED ON THE TREK
#1 – Must-haves
Good hiking boots and hiking poles. Period. They are worth the entire investment!
#2 – Slowness is bliss
A mountain guide in Austria once told us “there are no mountain trails that are too hard. You just have to take it slow. The speed of a snail is a superpower”. In addition, there is not much to do once you have arrived at the cabin. So better spend more time enjoying the view of the mountains while you are there. Walk slowly, look around, take a break, and soak up the scenery. It’s absurdly beautiful!
#3 – Stay updated
Like all other mountains in the world, Mont Blanc’s mood fluctuates like a lovesick teenager, and your hike will automatically be colored by the capricious weather. It can turn around in no time. And it can change enormously between heights. So even though the sun is shining warmly in the valley, it can be very cold up on the mountain – and vice versa, not least!
In addition, the nature of the trails can change suddenly because of rain, snow, and meltwater. Take weather precautions seriously and ask around when you meet locals or other hikers on the route. In general, it is a good rule of thumb on all hikes that you always check the weather forecast and the status of the trails on the day before you set off. This is especially important in the mountains, where the only guarantee is that there are no guarantees.
#4 – Energy boost
We brought nut bars, which we ate as little energy-rich snacks to keep the legs going. After lunch, we always felt a little drained and found that coke was the solution. Nothing works as effectively as the combination of sugar and caffeine!
#5 – Remember cabin shoes
On arrival at the cabins, you will be asked to leave your hiking boots and poles in a separate room. Some cabins have a basket standing with slippers, crocs, and flip-flops that you can borrow. Alternatively, you can bring your own change of shoes, which you can shuffle around in for the rest of the evening.
PACKING LIST:
BACKPACK FOR DAY HIKING
Choosing a backpack can be a challenge. It must match your needs, your outfit, and at the same time fit your body shape. In addition, the most difficult thing is to find the right size, especially for mountain hiking. It should neither be too small, so that you lack space, but not too big, so that you lug around too much.
Martin and I have two different daypacks for two different needs. Martin’s backpack is a LowePro Whistler BP 350 – a solid case made for photographers. Mettes is a LowePro Photo Sport BP 300 and is made for active travelers who want to take a camera with them on holiday. None of the backpacks are optimal for e.g. long-distance hiking or full packing, but together they match our needs when we are on day hikes.
Our packing list
• Day rucksack – preferably with a built-in rain cover
• Topo guide
• Map of the route
• Hiking poles
• Shell jacket (wind and rainproof)
• Lip balm
• Sun cream
• Sunglasses
• Hat
• Buff (2 each)
• Water reservoir
• Lunch
• Snacks
• Waste bag
• Camera
• iPhone
• Swiss army knife
• A small first aid kit with blister plasters, sports tape, handkerchiefs
TRAVEL STORIES ABOUT OUR HIKE
Tour du Mont Blanc was the first hike where we hiked several days in a row and from cabin to cabin. As novices in mountain hiking, we learned a great deal about hiking life. That is why we have made a couple of blog posts about the trip, where we share our experiences and show a lot of pictures from the hike.
The arrival
Here we share our thoughts before the hike. About expectations, concerns, and challenges. In addition, we tell you some historical information about the route, Tour du Mont Blanc, and why it is also called the ‘mountain of death’. Read HERE.
Stage 1
On the first stage we learned what it takes to hike in the mountains. We share our experience about physical challenges, risks, hiking pace, and indispensable gear. And then we are completely captivated by the landscape. Read HERE.
Stage 2
The second stage offered unexpected challenges and mixed weather. Here we write about how a typical day goes – from morning to evening. About practical details, hiking clothes for the mountains, cabins, and today’s meals. Read HERE.

TRAVEL INFO
Transportation
You can either drive to the French Chamonix valley, where you can, for example, park for free at the town of Le Tour – or fly to Geneva Airport, from where there are several different transport options. We can recommend Mountain Drop-offs, which offer individual transport by minibus. They offer round trips between the airport and directly to your hotel. The drive takes approx. 1 hour and a half and costs €35 per person each way.
Price
The total price for our trip was DKK 7,700 per person. The price is incl. plane ticket, transport to/from the airport and a so-called ‘comfort package trip’, which included overnight stays with half board and own double room, luggage transport, a walking map, and a Topo guide that described the route. In addition, we paid ourselves for hotel accommodation both one day before and after the hike, as well as lunch (approx. €3-12 per person each day) and drinks.